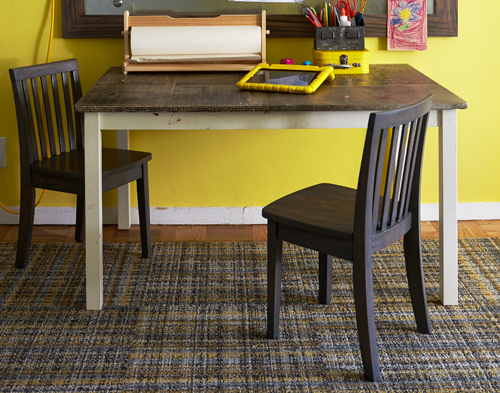
If y'all can paint your nails-- you can decoupage & it will CHANGE y'alls LIVES! Learn how...pic by Kelly Marshall
Read MoreCrafting
DECOUPAGE DREAMZZZ by me in this month's Real Simple Magazine
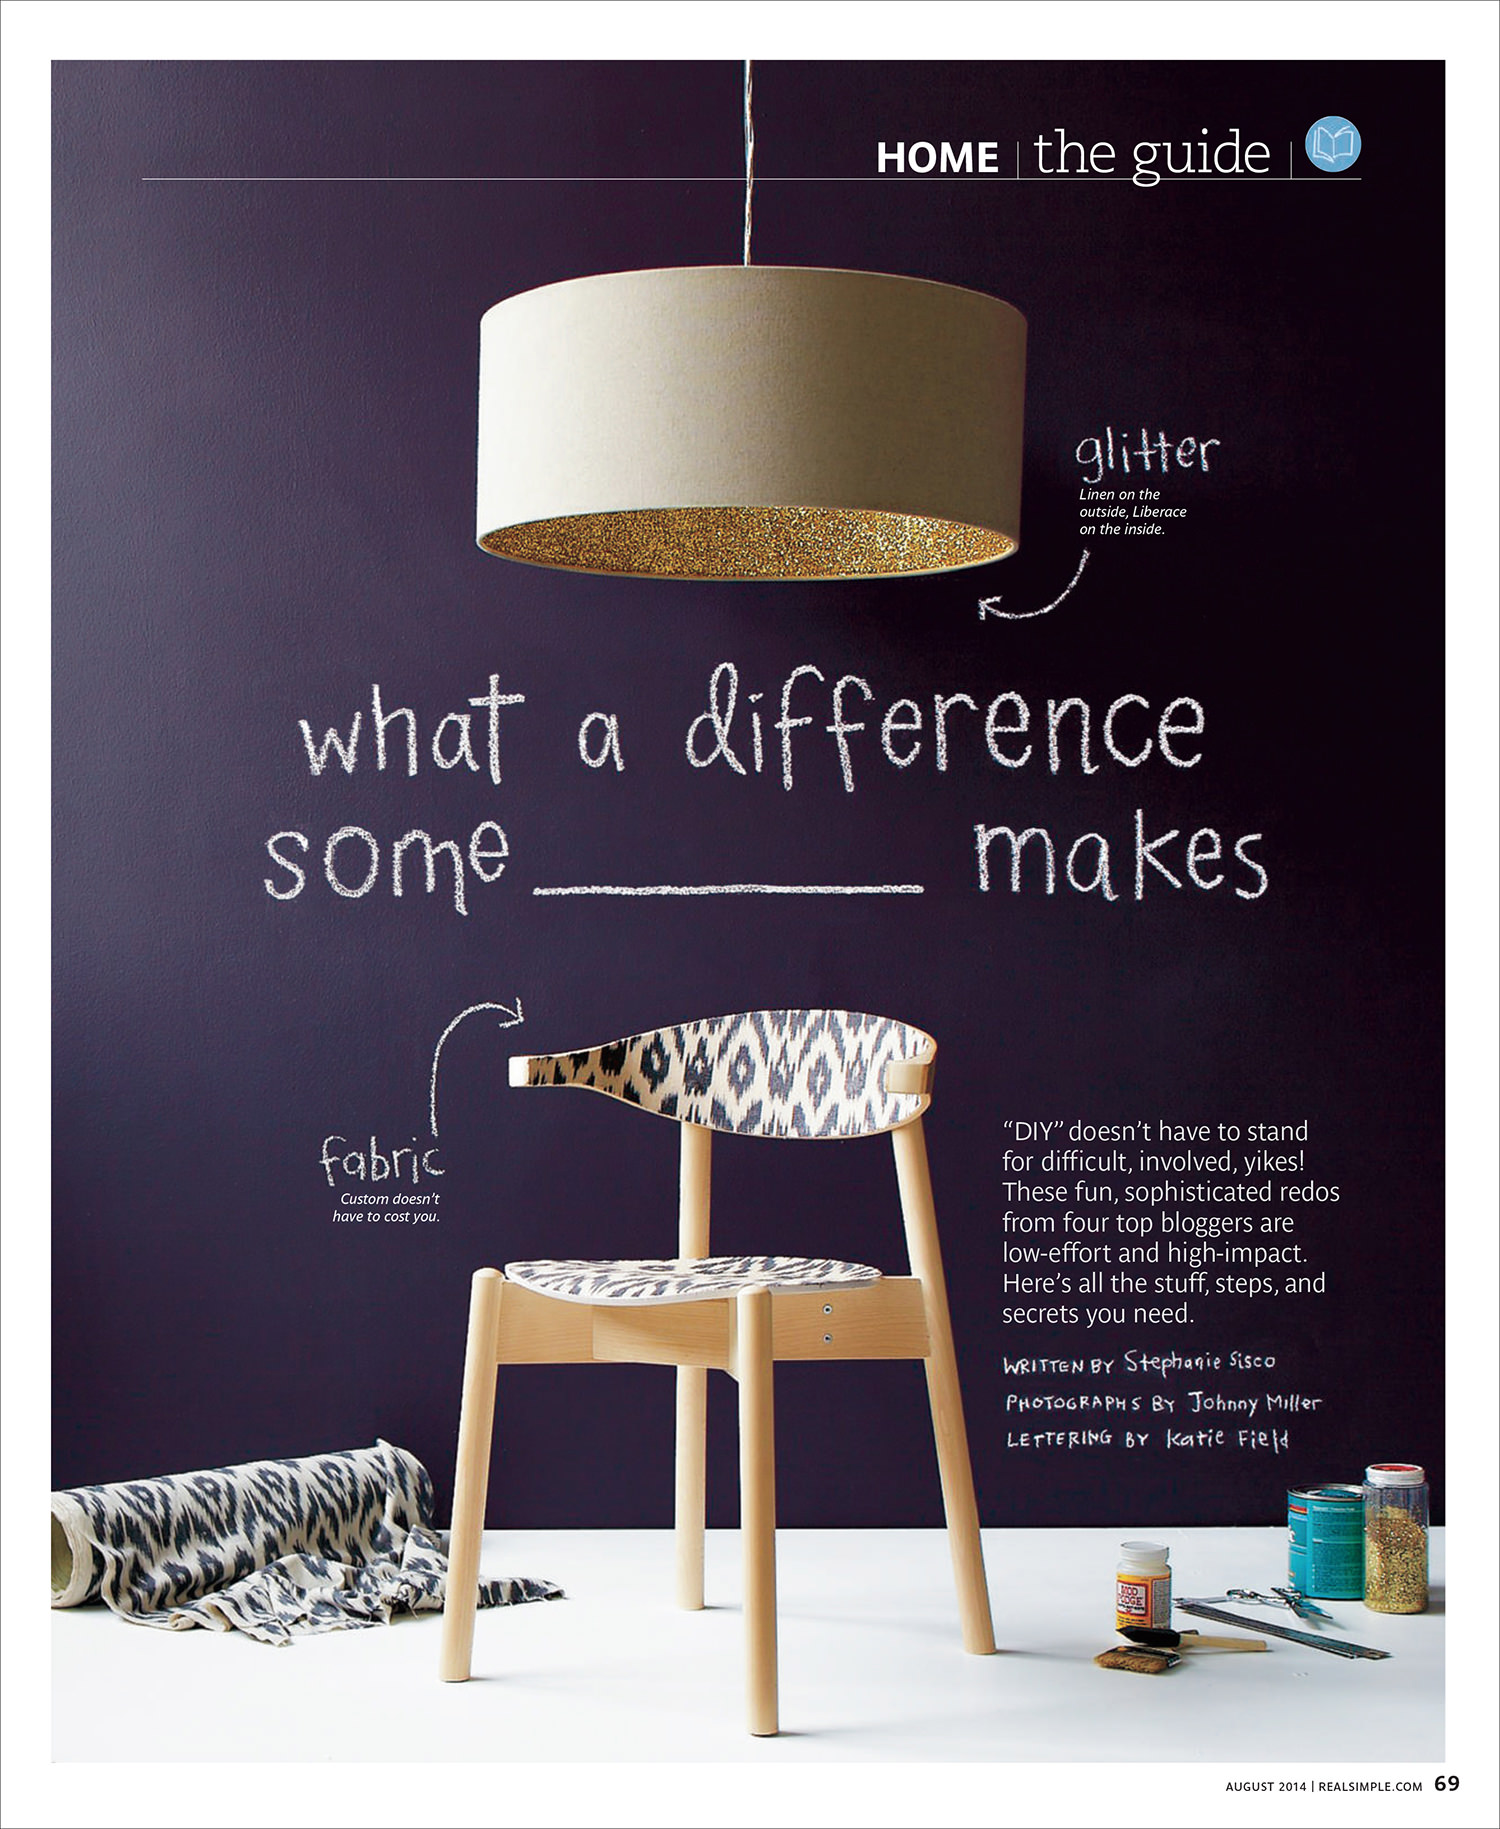
PJ DIY feature in Real Simple mag! HOLLA!
Read MoreGot y'all covered!
holla: check out my latest styling work on the Nov '13 cover of All You magazine...

y'all know you want to turn some pumpkins into a centerpiece!!! GET IT!
The Little Black...Nightstands!
A few weeks back I admitted, with gusto, that I painted wood...in copious amounts...all the time. And these Craigslist scores started like this:

Then were primed like so:

To turn out like THIS, Betch:
")
I mean...are y'all seeing this????:
")
WHAT?!?!
")
How insanely glossy gorgeous did this paint job make the old hardware look? WAY Gloss, WAY!
")
Show me those curves...sexy-time, oh!:
")
These gals just went from frau to mutha-f$%ckin' WOW! Class, how many of y'all are gonna start paintin' your wooden furniture now? Consider y'all-selves properly schooled!
It's Christmas...
in late August for All You magazine covers I'm styling today:


Get your baubles, berries & bling ready y'all...holidays are fast approaching! #wheredoestimego
The Alchemical Armoires
This luscious-ness is part of a pair that was scored off Craigslist for a clients office...Craigslist callback y'all!:

Like a lot of folks, she was desperado for extra storage...I'd say these gals fit the bill! Doors! Drawers! Cubbies & Shelves- OH MY!
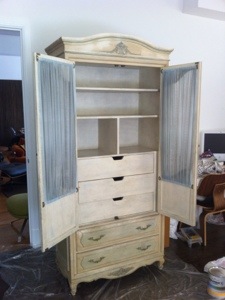
Problem? Chicken wire door inserts w/polyester curtain-age and heinous finish...
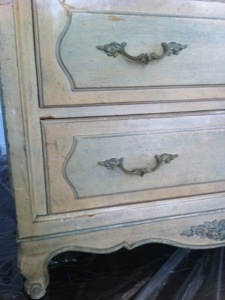
I'm just sayin'...lets fix that, shall we? Starting by chicken wire poly curtain removal and a gloss white paint job.
We used one coat Zinsser BIN primer and this new Advance Benjamin Moore paint that absolutely fulfilled our painting dreams!


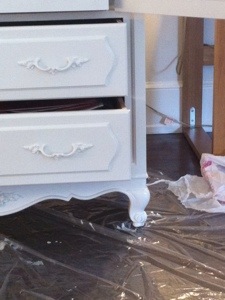
Next, chicken wire poly curtain replacement. Mirrors, y'all! I mean...tots obvi! I made a paper template for one door insert and had my glass guy cut four mirrors. Why? Symmetry, Dollbabies! So he cut two one way, then just flipped the template over to cut the other two mirror inserts the other way...make sense? Then I used Liquid Nails adhesive to secure the mirror panels in place. And then this happened:

And this:
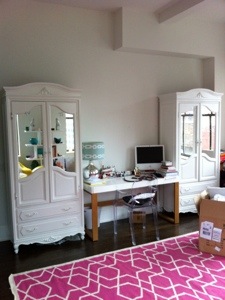
The room has a way to go still, but I'd say Drama-glam has been had, y'all!! Happy Friday!
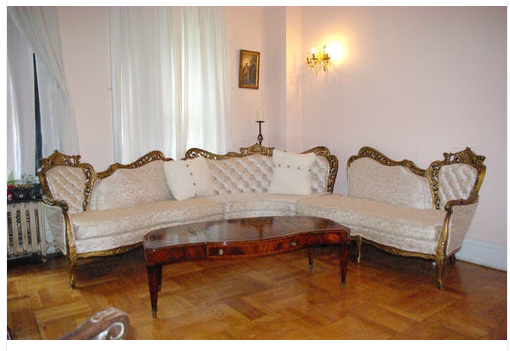
Sizzlin' Sectional
Disclaimer: I have little love for sectionals...they're usually ugly, cumbersome and all too common. I KNOW, y'all, way betch-y of me! But then this lady came into my life: Delight:

Indulge:

Pamper:

This was a major score at only $600 shut the F$CK YOU dollars!!! She was first being considered as a sofa option for one of my clients' apartments, but we'd already found an alternate option that was divine for that space, when babygirl presented herself for so cheap. But, rather than pass up extreme value, same client wanted her for his office!!! WHAT WHAT...Decorating kismet!!! All wheels were in motion until we got to see her up close and personal...she was a little more rough around the edges...janky upholstery accessorized with some questionable stains and uncomfy foam cushions that were actually disintegrating!!!! WHAT?! Those two problems aren't impossible to rectify, but they can be costly...considering what a bargain she was. Steam cleaning was a necessity! And new foam cushion inserts weren't that costly at around $350, thanks to the good folks at Economy Foam and Futon. But a total reupholstery job...not an option here. So how do you transform an upholstered piece of furniture WITHOUT reupholstering it? PAINT IT! So this:

Becomes this:

Can

y'all

fu%kin'
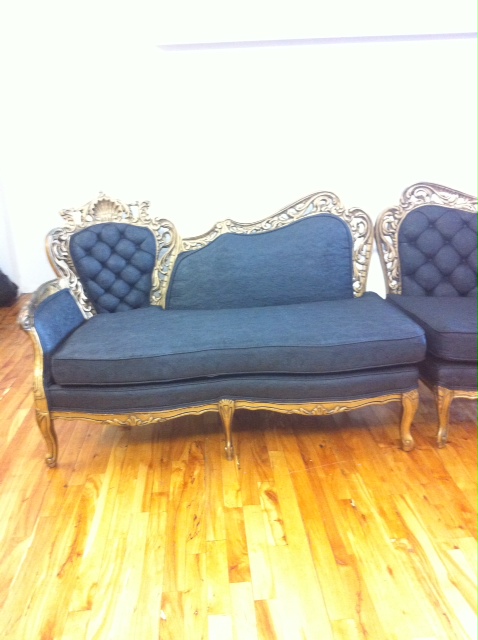
believe
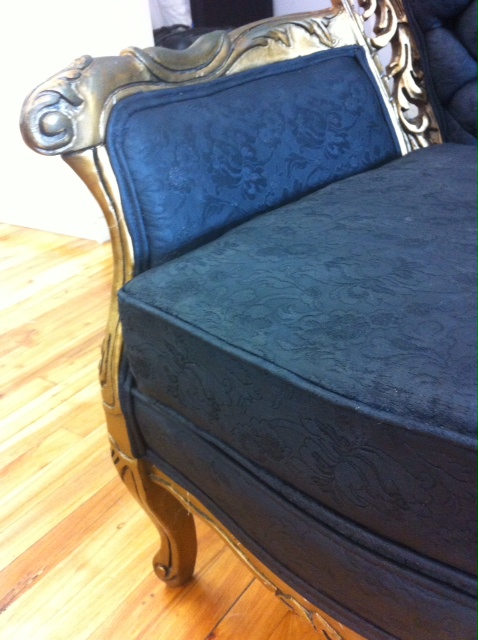
this????
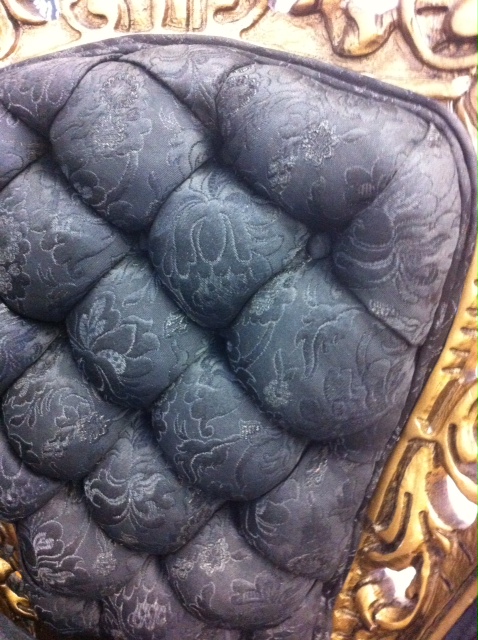
Consider y'all-selves STYLE SLAPPED BY WAY OF A SECTIONAL!!!! DAMN! Check back later for the yummy detailed how-to info...in the meantime, happy friday!
Get yer COLOR BLOCK on!
So how DO you get your walls and ceilings to look like this?

It's actually quite simple, y'all. Here's what you'll need to make your color block dreams come true:
-painters tape in whatever width you want (I used 2") -paint in two different colors (I opted for two tones that came right out of the area rug) in whatever finish you prefer -rollers, brushes, foam brushes or whatever combo of tools you prefer to paint with
And that's IT! YES!!!
Start by painting all the edges of each wall in one of your colors. Mine was the lighter raspberry/pink. Paint in deeper than the width of your painters tape. Mine was 2", so I painted in at least 3"-4" around all of my wall edges. Like this:


And since we were working on the wall edges already in the lighter tone, we went ahead and tackled the aluminum supports on the drop ceiling:

For the first coat, we chose to carefully lift each ceiling tile and turned it clockwise, resting it atop the backsides of the supports. Or maybe it was counter-clockwise? Whateve's, y'all just want to clear the front sides of supports of all tiles, so get them up and out of the way. And actually, after this first coat on the supports-- and we were moving on to painting in our other color-- we discovered it was almost impossible to get enough paint onto a ceiling tile approaching it from below, so we just went ahead and removed the tiles from the ceiling altogether to paint them. That was a big undertaking, but painting the tiles goes so much faster when you can lay them out. But more on that later.
So, once these coats have dried, start taping all the edges of your walls. You want to tape from the absolute furthest edge of your wall and follow that edge all the way from top to bottom, left to right. You're creating a box, or frame, around the edges of each of your walls with the paint tape. So, walls that are right next to one another will have corners that are basically taped out where they meet...make sense? Sounds odd, but trust it turns out fabulous! As you tape, be sure to push out any air bubbles and run your fingers along all the sides of tape in order to be sure it's 'locked' in place. Then paint the wall in your other color. In my case, it was the darker raspberry. Like this:

Be sure to tape around any significant architectural features, like doors and windows...

Y'all will also notice that lots of the ceiling tiles are already painted here. We did remove most of the tiles from the ceiling and laid them out in order to be able to roll them with paint. It's not impossible to paint them in place, but ceiling tiles are almost like giant sponges in that they're pitted and super-duper absorbent. Lovely! It actually takes a lot of pressure to get the paint inside all the holes AND get an even coat. Witness:

Also, some of your tiles won't be able to come out easily b/c they've got sprinklers, or vents, custom cut through them, so trust that you're gonna get your chance to put your back into it and paint some tiles in place...

But, applying all that pressure from upside down, wasn't working for me, so we laid them all out to paint (apologies for the insanely DARK images below, remember, all this painting was happening inside a nightclub, where the office is...I LOVE my job!):


We ended doing about two-three coats on our walls and probably four-five coats on the ceiling tiles. Then I went back in on a ladder, once we re-installed tiles, to do detail work and any missed spots.
Once everything is dried thoroughly, carefully remove all your tape. A great trick is to pull tape slowly at a 90 degree angle as you remove it, this way if any paint seeped through, etc., the angled direction will usually keep your line rather than pulling paint up. Here's a great shot of where tape is being removed from two walls that meet and both of them have the 2" lighter toned border:


Here's more 'liscious:


I love that b/c drop ceilings are usually hung in a grid, this paint technique was that much more successful b/c it really highlights that graphic quality. By treating the walls in the same way it becomes a huge style statement for the entire room, giving it both pattern AND color. I'm absolutely SLAIN! And if any of y'all try this technique at home or wherever, please share your pics!!! Happy painting!


An artful equation...


YUMMY!
MyColor inspired by Pantone Blog-A-Dazzle winner is...
![]() Jennifer C!!!!
Jennifer C!!!!
Congratulations to Jennifer who commented on last week's painting par-tay, saying, "I've got a few pieces of furniture I've found that I want to paint"...
Well, girl, your painting destiny is about to be fulfilled with 3 jars of MyColor inspired by Pantone paint in whatever colors you choose!
Now go get your PAINT on...and please feel free to send pics of your project, would love to see the transformations!!!
Congratulations!
It's ON: MyColor™ inspired by Pantone® Painting Party!
Woo-hoo! It's 12p EST and y'all know what THAT means? It's par-tay paint time!

Welcome to the MyColor inspired by Pantone painting party! Let's GET this! To review: there are a group of awesome diy blogger dynamos, including yours truly, who have all done up some projects using My Color inspired by Pantone paint. Expect to be inspired (duh), mesmerized...titillated even...by paint! Uh huh! Y'all could even win stuff! OH! And maybe, just maybe, today's the day y'all are gonna finally have your decorating destinies fulfilled, not only here on Blog-A-Dazzle...oh, no, y'all...you're embarking on a full-on painting treasure hunt, today! YES!
See, after you experience what I've got to share, you'll click on over to Cassie, at Primitive and Proper blog, who will beguile y'all with her paint magic! Here's the complete list in order:
Courtney @ A Thoughtful Place *Go Back to the Beginning!* PJ @ Blog-A-Dazzle *You Are Here!* Cassie @ Primitive and Proper *Continue to this Blog Next!* Holly @ Life in the Fun Lane Angela @ Number Fifty-Three Heather @ Paper Princess Studio
![]()
But first, I'm gettin' all kinds of diy dirty up in here with My Color inspired by Pantone Paint, 'cause that's just how I roller-on my parties (pun intended!) Oh shiot!:
I'd been given these three amazing graphic popsicle art prints from the amazing designer & illustrator, Erin Wengrovius, a while ago:

Y'all can score some of her work right here.
I've always had the best intentions to have them framed in some 'licious way, but y'all know how easy it is to blow out your decorating budget with custom framing...am I right? So, when asked to participate in this event, I knew just what I wanted to tackle: frame these lovelies!!! What's that got to do with paint? Well...
When framing, I love to take my color cues for my frame choice right off the artwork that's being framed and then sass up the whole situation even more by surrounding artwork with a thick white mat-- yummy! I also j'adore the idea of contrasting subject matter in the artwork with the frame type, like my modern & poppy art prints, paired with frames that look like this:

I scored these ornate-y frames for value dollars at thrift stores and flea markets. They're all kinds of janky-- some chips & dings, one was missing glass, but they're giving us all kinds of gilded glam that will contrast perfectly with clean & modern art prints.

The real icing on the cake starts oozing when I paint each one of them in a different coordinating color from My Color inspired by Pantone paint! Paired with the white mats, these sweet treats are gonna style-slap y'all with bright bold painted frame realness!!! Paint biotch!
FIRST: With either your artwork or measurements of your artwork in tow, troll area thrift stores, flea markets or other fun places you know that could yield used frame bounty. Each of my three frames were less than $15, so go dig up your own value!
SECOND: Take both your artwork AND your "new" frames to your local art frame shop. Have them cut mats for your artwork to fit into the frames you're providing in the color you choose. I almost always choose white, single mats. Prints Charming in Brooklyn is my go-to spot for these types of projects, they're awesome! (Note: Avoid drama here by calling ahead to your frame place to confirm they'll do this service for you. Most locally owned shops allow you to bring in your own frames, but there are some that prefer you purchase frames from them. By just purchasing mats and having them customized you are saving a small fortune with this step. Another great note: The frame you find doesn't have glass? Most frame shops offer glass for frames for dirt cheap, so GRAB it!)

THIRD: Prep frames for painting. Remove backing and glass. Clean frames. Once dry, paint frames in desired colors.

Depending upon the original color and finish of your frame, expect it to take two to three coats. Allow to dry between coats and before next step. For reference, the colors I used were: Tangerine Tango for the orange creamsicle art, Dandelion for the rainbow popsicle and Blithe for the rocket pop.

FOURTH: Reassemble frames by carefully inserting glass, your artwork with new mat and secure in back of frame. Now, go rock yo walls with your new artwork, y'all!!!
So as you can see, my mis-matched ornate-mess frames turned out stunning when style-slapped with bright poppy paint that matches the art within. How hot is that y'all? Tangy!
BUT WAIT, there's more: If y'all want to win a sample of MyColor™ inspired by Pantone® for y'all-selves, just comment on my post (you'll have up to a week from today to do so for y'all lazy a$$ skanks) and share how you’d use MyColor™ inspired by Pantone® in your next project or your life! Feel free to comment on the other blogs in the party too – they’ll all be giving away samples-- oh my, y'all, that's 5 potential samples! For a second chance to win, tweet your project ideas to @MyColorPaints using hashtag #PassItOn. Also check out and like the MyColor™ inspired by Pantone® Facebook page to get access to the schedule for today’s parties as well as the rest of the parties going on this month! Share your project ideas there for one more chance to win!
And don't forget to continue your DIY Painting Party journey with my fellow Par-tay bloggers. Next stop on this party bus is with Cassie at Primitive and Proper. Happy paint party!

Dazzle Disclaimer, y'all: MyColor™ inspired by Pantone® reached out to me to participate in the MyColor™ inspired by Pantone® Painting Party. My post represents my honest experience with MyColor™ inspired by Pantone® paint. I am not being paid for my answers, but I did receive MyColor™ inspired by Pantone® paint to use for this project.
Blog-A-Dazzle & MyColor inspired by Pantone Painting Party TOMORROW 10/17, 12p EST!!!
![]() Y'all, I'm thrilled to share that I was asked to participate in a painting party for MyColor inspired by Pantone paint!!! Holla! What in hell does THAT mean, y'all ask??? Well, along with four other awesome diy bloggers, who will be blogging at the same time with cool projects of their own, I'll be completing a special diy project using MyColor inspired by Pantone paint.
Y'all, I'm thrilled to share that I was asked to participate in a painting party for MyColor inspired by Pantone paint!!! Holla! What in hell does THAT mean, y'all ask??? Well, along with four other awesome diy bloggers, who will be blogging at the same time with cool projects of their own, I'll be completing a special diy project using MyColor inspired by Pantone paint.
In addition to learning all the 411 on my project, y'all will be able to scoot over to the next diy blogger's post in a pre-determined order and get more ideas and inspiration from their projects. The BEST part? Y'all can comment on my post for a chance to win a sample of MyColor inspired by Pantone paint!!! What-What?! FREE PAINT, y'all!!! Get IT! VALUE! Here are the other diy dynamos and the order of the party (they'll be links and more detailed instructions in tomorrow's post, this is a friendly heads-up):
Courtney @ A Thoughtful Place PJ @ Blog-A-Dazzle Cassie @ Primitive and Proper Holly @ Life in the Fun Lane Angela @ Number Fifty-Three Heather @ Paper Princess Studio
Remember, the par-tay starts at 12p EST sharp. So, this means, regardless of where you live, y'all need to do some math and figure out what time 12p EST is for you and then hit up Blog-A-Dazzle to fulfill your painting destinies, ok?!!
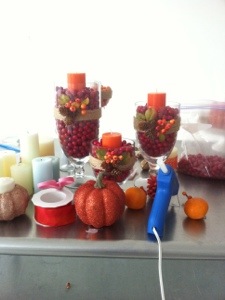
Y'all, get some gourds...it's FALL!
I love Fall, always have. And it's one of the BEST times to be in NYC. It's also a great time to think about our decor and how to reflect the change in seasons inside. Here's an inspiring article on how to get really creative with gourds. Enjoy, y'all...

IT’S DECORATIVE GOURD SEASON, MOTHERF&$KERS.
BY COLIN NISSAN - - - - I don’t know about you, but I can’t wait to get my hands on some f&$king gourds and arrange them in a horn-shaped basket on my dining room table. That sh*t is going to look so seasonal. I’m about to head up to the attic right now to find that wicker f&$ker, dust it off, and jam it with an insanely ornate assortment of shellacked vegetables. When my guests come over it’s gonna be like, BLAMMO! Check out my shellacked decorative vegetables, a@@holes. Guess what season it is—f&$king fall. There’s a nip in the air and my house is full of mutant f&$king squash.
I may even throw some multi-colored leaves into the mix, all haphazard like a crisp October breeze just blew through and f&$ked that sh*t up. Then I’m going to get to work on making a beautiful f&$king gourd necklace for myself. People are going to be like, “Aren’t those gourds straining your neck?” And I’m just going to thread another gourd onto my necklace without breaking their gaze and quietly reply, “It’s fall, f&$kfaces. You’re either ready to reap this freaky-a@@ed harvest or you’re not.”
Carving orange pumpkins sounds like a pretty fitting way to ring in the season. You know what else does? Performing an all-gourd reenactment of an episode of Diff’rent Strokes—specifically the one when Arnold and Dudley experience a disturbing brush with sexual molestation. Well, this sh*t just got real, didn’t it? Felonies and gourds have one very important commonality: they’re both extremely f&$king real. Sorry if that’s upsetting, but I’m not doing you any favors by shielding you from this anymore.
The next thing I’m going to do is carve one of the longer gourds into a perfect replica of the Mayflower as a shout-out to our Pilgrim forefathers. Then I’m going to do lines of blow off its hull with a hooker. Why? Because it’s not summer, it’s not winter, and it’s not spring. Grab a calendar and pull your f&$king heads out of your a@@es; it’s fall, f&$kers.
Have you ever been in an Italian deli with salamis hanging from their ceiling? Well then you’re going to f&$king love my house. Just look where you’re walking or you’ll get KO’d by the gauntlet of misshapen, zucchini-descendant bastards swinging from above. And when you do, you’re going to hear a very loud, very stereotypical Italian laugh coming from me. Consider yourself warned.
For now, all I plan to do is to throw on a flannel shirt, some tattered overalls, and a floppy f&$king hat and stand in the middle of a cornfield for a few days. The first crow that tries to land on me is going to get his avian a@@ biotch-slapped all the way back to summer.
Welcome to autumn, f&$kheads!
(Click here for the story as it appears in McSweeney's and here to go to Colin's website for more tangy writing! Pic above from The 2 Seasons blog story on how-to make a gourd centerpiece.)
It's time...Thrift Whores...
For some HOT Before and After action up in this 'dazzle, what...THRIFT WHORE THURSDAY!?!This thrift store armoire was scored for a client while out whoring weeks ago:

Don't be shy babydoll, we need to see the goods:

Here's where we are today:

And:

YES, y'all! This armoire has been totally tricked out: new paint job, drawers lined in pink felt, custom mirror added to the inside back topped off with some interior lighting chic-ness!


The client is just thrilled beyond belief with how this turned out and so am I...just goes to show y'all what some good honest thrift whoring can do for your lives...happy whoring!
What is a prop stylist?
in Crafting, How-To, Prop Styling
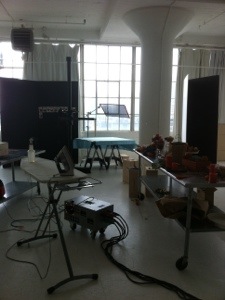
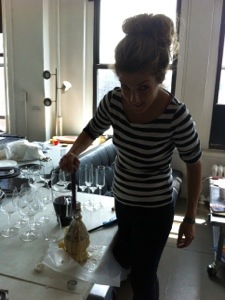
A lot of times when I tell people about my work as a prop stylist, they go all 'deer in headlights' and usually say something like, 'what's that?', 'huh?', 'you do hair?' Here's what a prop stylist does:

What in hell is that, y'all ask? It's a chianti bottle and it's having candle wax dripped on it for a photograph that will eventually make it's way on a page in a major magazine...they'll be some clever service point to you telling y'all how to take your chianti bottle & reuse it as a candleholder when y'all set that effortless dinner table for your festive holiday party!
Oh, wait...y'all didn't think that those gorgeous shots of rooms/homes/people/parties just happened to be that way, naturally and a photographer just snapped a pic of it? Not always, but you're seeing smoke & mirrors, my friends...or in my case, from my shoot yesterday...bottles and candlewax...

This lovely moment was actually executed by the uber-talented, Andrea Greco, aka Candy, who's a crafting fiend!
So next time y'all are thumbing through the pages of your favorite magazine, wondering if people really live/eat/entertain like that, all the time? The answer might just be no...a prop stylist made it look that way!!!
Grocery Cart Goes Glam!
Y'all, I've had this amazing vintage shopping cart for almost a year:
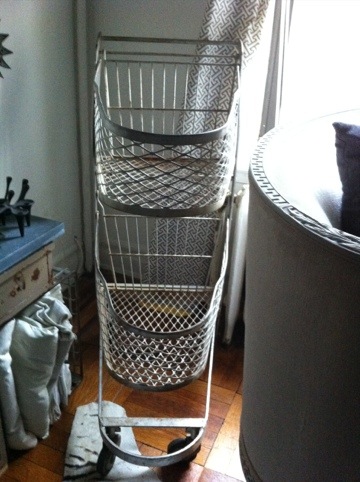
Such an amazing score!
And honestly, she's just so chic, AS IS, sitting all side table-like in the corner of my salon-- uh huh, I typed salon-- but that's just way too easy for the likes of me. This gal is becoming our new bar cart! Oh shiot, y'all were just style-slapped!!!
 I'm going to have glass custom cut for the bottoms of each of the basket levels, so they become usable/level surfaces from which to get my drink on. Bottoms? Basket? This post sure is gettin' good, y'all-- damn! And I'm not even done yet!
 Once I add my bar (bottles, ice bucket, maybe some glassware, cocktail napkins, etc) and viola...it's happy hour!!! This is probably one of the easiest repurposing projects I'll ever do...so, naturally it's taken almost a year to get done, but whatev's...it's going to be amazing, so stay tuned to get some hot AFTER reveal action, y'all!
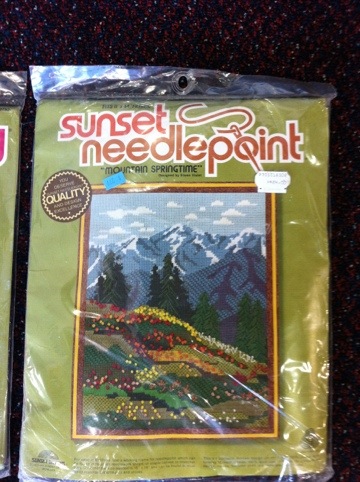
Sunset Stitchery
It's no secret that I'm slightly obsessed with vintage yarn art and embroidery...so, imagine my joy upon discovering these beauties while thrifting on vacation in Birmingham:
 This absolute score is actually three different vintage unopened embroidery kits that include the printed design on cotton mesh, wool yarn AND needles-- for $2.99 each! Ahhh, Salvation Army Family Store still knows how to slay us with some value, y'all...
There's "Mountain Springtime" (this gal would've cost $24.00 from JC Penney, according to the original price sticker still attached)
"Apple Time" (Her sticker says she was $15.99 at The Craft Showcase, but poor thing was reduced to $10.39 and still no one bought her! Damn!)

And of course, the serendipitous: "Lazy Days" (Oh shiot, The Craft Showcase was also selling her for just $14.99, but no one got off their lazy ass to buy back then-- I sure as hell did!)

I'm not certain how these gloriously heinous kits will become my latest works of art...wall hangings?...pillows? but trust, y'all, that something scrumptious will be served and stitched right into my collection!!!
Turkey Time with PJ & Essence magazine!

Y'all, believe it or not, Thanksgiving is just around the corner...and it's not too soon to begin your planning to avoid last-minute manic panic...might I recommend this amazing article in the November 2011 issue of Essence magazine? Yes, considering I styled AND am giving style tips in it, I just might! Get yourselves a copy & get ready for yummy, y'all:

Twine-tastic!!!
Y’all, I love using unexpected materials for projects…the other day while prepping for a shoot I was style-slapped when I came across these giant spools of baker’s twine at NY Cake!

Baker’s twine has such a cool, graphic quality about it. Love it paired with plain craft paper as ribbon for gift wrapping, like these two from Whisker Graphics that feature Air Mail twine, oh!


Or try using twine to tie ornaments on the tree. Thread some through small vintage ornaments and tie around the top of your glass jars from the recycling bin and you’ve got double the style value with some easy holiday vases! (forgive my holiday-centric ideas, but have already worked on three different holiday stories recently, so they’re fresh in my head) And take yourselves there by using colors other than the traditional red & white: charcoal grey (super chic!!!), orange, yellow, even turquoise—what?! These fun colors can work for any holidays or other festive occasions throughout the year.

The larger spools at NY Cake are just $17.99 for what appears to be like a million yards of twine & the smaller spools, $15.99. NY Cake also has a west coast location in L.A. (10665 W Pico Blvd), but y'all can also get your twine online from The Twinery (check out their fun blog too!) and Whisker Graphics Now go tie some on, y'all!
Get your craft on!
Y’all, I got a cool opportunity this past week to do some crafting goodness for a Family Fun magazine Halloween segment on the Regis & Kelly Show! The crafts were super-cute and for the most part, super-easy! (Big southern shout-out to Dyl who sacrificed most of his weekend and several hours of sleep to help—Yeehaw, Dyl! You took us there!) The segment aired on Wed 10/27 and went really well. Y’all can watch it live right here. Once you click the link, you'll have to click on Videos and then scroll down to the "Pumpkin Alternatives" video. Enjoy! Now, I’m no stranger to being on a set, but live shows are an entirely different beast! Pun intended- Happy Halloween, Y’all!!! Scary! I wasn’t there on the day of the shoot, I had to come in the afternoon before to pre-set all the crafts and decorate the tables. Then, they just rolled the tables into place when they were ready to shoot the following day. As a stylist and control freak, this was a bit nerve-wracking— because whenever there’s tables with wheels involved, whatever pretty tablescape you’ve got going on, may not always be what shows up when it reaches it’s destination. But, all in all, I think everything looked great and of course, Regis (especially) and Kelly were hysterical to watch. Happy Halloween y'all!
