So y'all know what that means? Time to get your drank on!!! And it just so happens that I'll be enjoying mine from my new bar cart! Oh shiot, lookee here...warning...HOT AFTER ACTION:

This is probably one of the easiest diy's I've ever done! And I just j'adore how it turned out...It's amazing to me how you can completely transform something from it's intended purpose into something else entirely-- with the easy addition of some custom cut glass.


Here's how I made this all happen...
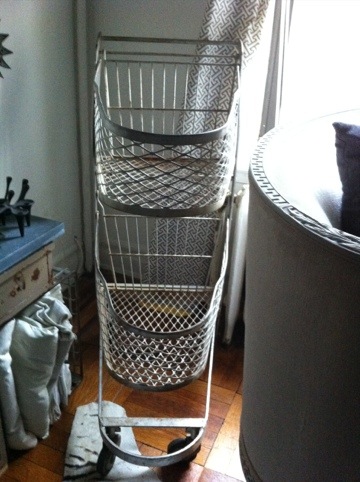
*Create a template for the area that you wish to put glass atop/on. If you're blessed to have a cart with a square or rectangular situation, then this project is even EASIER and you're a biotch! BUT, if, like me, you have an irregular shape that you're working with-- pear, rotund, obtuse c'ankle-- what have you...then y'all have to make a template for glass cutter to work off. I made mine out of craft paper.
*Next cut a rough approximate shape from paper. Holding that shape firmly in place, trace the underside/bottom edges of the basket where your glass will eventually sit inside of. Make sense? This allows ya'll to get the exact shape of the area you want glass cut for.
*Lastly, trim off about 1.5" more from the tracing line you just made in the paper edge with scissors to allow for some clearance of the glass, so it won't scrape against the metal of the cart, once cut. Now you've made your template, which should look something like this:


And there y'all have it! Remember to always measure twice (or even three times) and cut once. Also, as a back-up back-up, if you're just nervous as all hell to trust your template-making skills, you can always bring your cart to your glass cutter. Y'all want at least 1/4" thick glass with a safety edge. My two pieces ran me about $60/each...so, not dirt cheap, but not cra cra either. And this little lady may not always be just a bar cart in my space-- she can now become a side table or console of sorts, etc...so the minimal investment has yielded double and potentially even TRIPLE value, y'all...and that's not something we take lightly here at Blog-A-Dazzle!!! Triple Value!
 Cheers!