Cheap Style Tips & Savings

Bring me my Bulletin Board!

A door that has a custom bulletin board added to inset panel You’ve most likely heard the edict, ‘Make your walls work for you’ and if you haven’t, well, then…make your walls work for you. But I’m going to get all kinds of cra cra on yo asses and declare, ‘Make your doors work for you!’ Uh huh! Scandal! Y’all didn’t realize your doors could do more for you than just open and close? Oh Dahling…have I got a post for you…

With my ever-expanding style empire, ahem ahem, I found myself in need of a large bulletin board. Y’all know, to pin up all that style and what not. But since my apt walls are almost filled to capacity, I was going to have to get creative and carve out another spot for my pinning pleasure. Hello closet door! Just behind my desk in my office area, is my prop closet with a door that has a inset panel just begging to be used! First version of prop closet door At 1 ft wide and over 5 ft high, somebody just got themselves a big ole bulletin board. Actually, TWO b/c the back of the door has the same inset! Now, that’s what I call a double style backslap! But before any slapping can begin, I've got work to do...and so will y'all when you decide to take yourselves there and make this tangy treat for your space...check back tomorrow to get all the dirty DIY details...yummy!

Cheap chic served at Target!

En route to a beach housewarming party, Dyl and I put on our big girl panties to brave Target Atlantic Center on a Saturday. Which for those of y'all who've experienced this firsthand, you know I speak the truth...this isn't just some 'Dynasty' tv show drama...this is full on Tar-ghetto at its finest, y'all! Well, well, imagine my joy upon seeing this graphic greet us at the door:

20120623-213138.jpg

Awww, that's a puppy after my own value-driven heart...y'all know biotch loves a bargain! And lo and behold, we found these wicker wrapped glasses on clearance that were just too cute to pass up, ruff ruff!

20120623-213731.jpg

Have y'all ever beheld so much joy? That's not a glare from the glasses, oh no...that's bargain shining through!! HOT! And at $4.18 a pop, our new homeowner will have the happiest AND warmest home on the block! Cheers!

A ray of sunshine in an Ikea runner!!!

Y'all, the good folks at Ikea must just be beyond exhausted, what with all the style sass they're constantly serving us...just yesterday I was in the Brooklyn store and was style slapped by this new runner:

20120623-130817.jpg

I'm just j'adoring the fun, poppy stripes of this beauty...AND the fact that she's a mere $24.99 is just icing on a cinnamon bun!!! (of which we bought a dozen before leaving the store-- oh shiot, yes!!!)

20120623-131136.jpg

The rug is called Barbro Rand and it's 6'7"L x 2'x7"W...get more details here...I also love the fact that b/c she's a flat weave, I can customize her to fit whatever dimensions I need without all kinds of binding/fraying drama...genius!

20120623-131720.jpg

So go on and get y'all some Ikea Barbro Rand action for an easy splash of summer style 'lisciousness...the yummy cinnamon buns are optional, of course!!!

The bath mat that changed my life...

More often than not, I find myself mired in some sort of decorating dilemma or another. I'm looking for a certain THING for my apartment, a lamp, a coffee table, window treatments...whatever it is. I scour the market trying to find what I want, and a lot of times-- like a lover-- I find the perfect match! HOT! But, usually, the solution requires that I take matters into my own hands...oh ecstasy! And that's when things get all d.i.y. dirty up in Patrician Court, y'all! Such was the case when I was looking for a hallway runner. I wanted something patterned, narrow and long. Most NYC apartment hallways aren't these grand wide spaces that can accomodate the standard 2'.5" x 7' runners that you see all over the market. Even if you go for it, at best, you're getting the look of a stubby wall to wall runner and we don't generally respond well to stubby here at Blog-A-Dazzle. No, no. Besides, our hallway has a kick ass mahogany inlay, why would I want to cover up an inlay, y'all?! Shut the &$ck you, I wouldn't! And neither should you! So, my runner had to be between 18"-22" wide and at least 8' long. We'd found a temporary fix that was as plain jane as they come, but at least it was narrow AND cheap.

Pic of runner in hallway BEFORE new runner

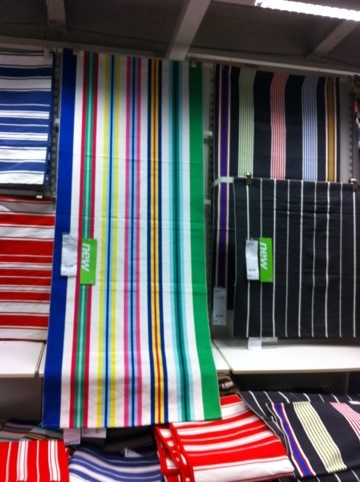
In the meantime I went hunting high and low for my perfect runner. And hunting. And hunting. Sweet summer skipped into azure autumn, leaves changed. Fall brought brisk nights, but no runner. Bummer. And then-- a random stop into West Elm changed my fate...forever. There, I found my runner...but not as I expected-- these things never are, folks-- it was a bath mat that seduced me! Pic of bath mat from West Elm

Gorgeously patterned, soft and supple, 20" wide, $29 dollars!...and...what? Only 34" LONG?! Cruel, cruel fate! But don't cry for me, y'all...with some simple d.i.y. enhancements I spurned fate and now...for under $100 bucks, I have the runner of my dreams...and y'all can too. Here's how:

1. Purchase the quantity of mats that will equal the overall length you'll want when finished. I bought 3 to give me a little over 8'. Of note: be sure you confirm the widths of each of your bath mats by holding them up to one another before purchasing...I found there was some discrepancies with widths, though minor, even though it's the same bath mat. The widths must match up to look seamless. Lay them out on floor, end to end and then carefully remove the seams of the ends that are being joined, with a seam ripper.

2. Iron flat the loose ends of each bath mat that you removed seams from. Then, align them front to front.

You choose which sides you want to be your front. The pattern is on both sides of the mat, so see which two mats can match up as perfectly as possible...those should be your fronts. Note: the opposite end of your mat is already finished with a hem, so you can simply let that hem dictate which side is your front. Otherwise, you'll have to re-do that end hem as well if you switch it.

Pin the loose ends together, on the back side, being mindful to line up patterns. (I used T pins b/c the mats are somewhat thick and textured).

3. Carefully sew the two ends together. Be mindful to remove T pins as you sew. Go slow with this, y'all, the mats are textured and somewhat plush, so don't force your machine...she'll get angry and stop working!

4. Once sewn, lay rug, front side down. Iron out the two sides of your new seam.

Then trim off excess material.

Iron one last time and flip over your new rug, y'all! Safety first: make sure you use a non-slip rug pad and enjoy...our dog Brandon sure is!

Turkey Time with PJ & Essence magazine!

Cover of November 2011 Essence magazine

Y'all, believe it or not, Thanksgiving is just around the corner...and it's not too soon to begin your planning to avoid last-minute manic panic...might I recommend this amazing article in the November 2011 issue of Essence magazine? Yes, considering I styled AND am giving style tips in it, I just might! Get yourselves a copy & get ready for yummy, y'all:

Title page and style tip exerpts from Essence Nov 2011 article

Twine-tastic!!!

Y’all, I love using unexpected materials for projects…the other day while prepping for a shoot I was style-slapped when I came across these giant spools of baker’s twine at NY Cake! Red and green large spool of Baker's twine

Baker’s twine has such a cool, graphic quality about it. Love it paired with plain craft paper as ribbon for gift wrapping, like these two from Whisker Graphics that feature Air Mail twine, oh!

Pic of gifts wrapped in craft paper and red, white and blue twine as ribbon Craft paper wrapped package with baker's twine as ribbon

Or try using twine to tie ornaments on the tree. Thread some through small vintage ornaments and tie around the top of your glass jars from the recycling bin and you’ve got double the style value with some easy holiday vases! (forgive my holiday-centric ideas, but have already worked on three different holiday stories recently, so they’re fresh in my head) And take yourselves there by using colors other than the traditional red & white: charcoal grey (super chic!!!), orange, yellow, even turquoise—what?! These fun colors can work for any holidays or other festive occasions throughout the year.

Smaller, colorful spools of Baker's Twine

The larger spools at NY Cake are just $17.99 for what appears to be like a million yards of twine & the smaller spools, $15.99. NY Cake also has a west coast location in L.A. (10665 W Pico Blvd), but y'all can also get your twine online from The Twinery (check out their fun blog too!) and Whisker Graphics Now go tie some on, y'all!

Kitchen Cabinet-liscious Complete!

Kitchen Cabinets all painted white Alternate view of painted cabinets

A detail shot of painted lower cabinet next to 'granite' countertop

Painted cabinets alternate after shot

It was a mere four days ago that our kitchen cabinets were serving some heapin' helpins of 'oak' horrendousness, only to be transformed with a super-easy paint job! Our kitchen is lighter, brighter and feels brand new! And shut the &$ck y'all, this makeover only cost me $60 in supplies! Now, this is what I call yummy, y'all!

Kitchen Cabinet-liscious! Part 2

A collage of cabinet painting progress shots Y'all, I'm well on my way to one sweet & sassy kitchen! The process has been smooth-sailing 'cause I'm totally in my 'paint place'-- that mindless, in-the-groove, itunes on, paintbrush-as-microphone place...we ARE a part of a Rhythm Nation, y'all! Sing it 'cause you want a better way of life-- through painted kitchen cabinets! And scene...

Y’all will notice I’m only painting the exterior doors and drawers. I wanted this process to be as easy and stress-free as possible. This may seem a little janky, but I don’t care how golden-y-oak the interiors are. For me, it’s all about the aesthetics on the outside…which, incidentally, also happens to be my philosophy about people. Oh shiot-- He didn’t? Oh, he DID y’all!

But, in all seriousness, painting your cabinets is probably the cheapest and easiest way to completely change the look of your kitchen, thereby giving you more drama than you can possibly ingest in one sitting. Just how dramatic you want to be is entirely up to you, but here’s how I’m getting my glam grove back into my cabinets:

1. Prep cabinets by giving them a light sanding and then a cleaning to remove dirt/dust. (Since I had thoroughly scoured my cabinets before—and in the process taken off most of the varnish, I didn’t need to sand them). Y'all can always opt out of sanding completely, b/c it's a total pain in the ass, but then you absolutely have to use the primer product detailed in step 3.

  • Tip: To avoid even MORE work, just slide contents in cabinets towards the back rather than completely emptying them out.

2. Remove cabinet doors and drawer faces. Then remove hinges...I opted to tackle one section, or “box” at a time, for space-saving & sanity purposes. (FYI, your cabinets are actually separate, box-like structures, some with doors, some with drawers & some with a combo of both)

  • Tip: Be sure to have a labeling system for all these components…last thing you want to do is lose any hardware or get cabinet doors mixed-up.

3. Prime everything that you’ll eventually want painted with one coat of BIN Primer Ultimate Stain Blocker made by Zinsser. I have no clue what this stuff is made of and it will most likely be around long after any of us are, but it’s amazing! It completely covers any and all imperfections AND apparently eliminates having the need for any sanding whatsover! The can even says it covers “fire, smoke and water” damage, for those of y’all who have cabinets that have been REALLY rode hard. I used a 2” foam roller, following the grain of wood. Where necessary, I used smaller, craft foam “brushes” in hard to reach areas.

  • Tip: Cat food or any kind of canned goods make great "risers" when painting cabinet doors and drawer faces. Use four of the same size canned goods and you've got the perfect elevation in which to tackle the edges of doors and drawers. Drips are janky, so watch yourselves y'all!

A cat food can makes for a perfect paint riser!

  • Another Tip: Avoid paintbrushes and rollers drying out. I'm using two different paintbrush/roller sets, one for primer & one for actual paint. At the end of my day, I wrap each set in saran wrap and place in the freezer. Uh-huh, I wrote freezer, y'all. After a few minutes of thawing out, the sets are fresh and ready to be re-used the next day.

4. Once primer coat has thoroughly dried, it’s time for the paint. I used Benjamin Moore’s Ben Premium Semi-gloss Interior Latex Paint in White. Same situation with the foam brushes and going in the same direction of wood. Once paint is completely dry, carefully replace all hardware and just gently run your fingers over your freshly painted work, experiencing a 'tender caresses' decorating moment like you wouldn't believe. YOU did this! Savor and be satisfied!

Kitchen Cabinet-liscious! Part 1

A pic of an empty kitchen with heinous oak cabinets Y’all, one of the biggest projects off my apartment ‘Master List’ is painting our kitchen cabinets. Some poor soul, somewhere, thought golden oak cabinetry was just BEYOND glamorous. And then they went and punctuated it with bronzey-brass hinges! I just knew I was going to be greeted by a big ole shoulder pad when opening one of the cabinets for the first time! But instead of being served ‘Dynasty’, all I got was dead roaches and mouse droppings. And y’all know, that’s not the kind of drama I want coming out of my kitchen, oh no, shut the fu$% YOU! So, my first week in our place was spent scouring every inch of that kitchen beyond belief…yummy!

Fast forward to now: there’s been LOTS of drama in that kitchen and thankfully none that involve crawly-critters. I’ve begun to tackle the painting and it’s been going so well—I couldn’t be more pleased! Shot of kitchen cabinets in process of being re-painted

Shot of painted cabinet door open

Additional shot of painted kitchen cabinet

As y'all can see, I decided to go for a clean, simple and modern update by choosing white. There's also white in the "granite" countertop, so I knew I couldn't go wrong. I'm already backslapped by how great it looks and I'm not even halfway finished! The entire kitchen looks brighter and the cabinets look brand new. And y'all aren't even going to believe this, but I'm not even bothered by the brass hinges now b/c when paired with crisp white, their brass patina is chic! I said BRASS-SLAPPED! This is gettin' good, y'all...BUT WAIT, there's more! Be sure to check back-- I'll be sharing my progress as well as my step by step painting tips and tricks...tender decorating at it's finest!

Style SAVINGS on Lampshades y'all!

Y’all know Blog-a-dazzle is all about VALUE, especially when it comes to style! And for those dazzlers living in the NYC area, you’re about to be backslapped with savings! Just Shades — one of my favorite lampshade sources, featured here in one of my previous posts--- has a Groupon, offering $40 worth of lampshades for only $20!!! This deal is only being offered for six more days, so y’all better get on it! You can find all kinds of lampshade sass at Just Shades — plus, they’re super-helpful too, so picking the perfect size & shape shade for your lamp will be a stress-free snap. Holla!

Getting Horizontal-- with paint stripes!

Don’t y’all just love waking up on a random Sunday morning with the spontaneous notion to paint a room-- Coffee? Bagel? 10” black & white horizontal stripes in the entryway? Easy! Actually, y’all, painting our entryway had been on my master punchlist for our Patrician Court apt. ever since moving in. I’d just been hemming and hawing about it, b/c it couldn’t just be a ‘typical’ paint job, no no. I wanted stripes! BIG BOLD horizontal stripes! Stripes aren’t really the devil’s work, y’all, they just require the right ingredients: a lot of perseverance, a laser level, painters tape and good paint. Oh, and a tireless husband who knows better than to say no! Check out this Before and After Backslap: Hallway paint stripes before and after

Shut the ?!ck y’all! YES! I’m sooooo thrilled at how these turned out! Major drama, for minor money…in fact, these stripes are taking me there so much, I really don’t even need artwork-- another great reason for tricking out your walls with a bold paint treatment. Whether you want to get horizontal-- oh la la, y’all-- or vertical, the key to getting sexy stripes, is all in the technique.

So, here’s how we did it (don’t let the lengthy text scare y’all-- it’s easy, and a little length goes a long way, oh shiot!):

1. Once you’ve decided on your colors, you’ll need to paint the walls you want to treat with a coat of the base color (the background color that goes all the way up to the top and bottom of the wall). Mine was white.

2. Once that coat is dry, it’s time to tape out your stripes! A laser level is a HUGE help here! Decide on the width of your stripes and divide out the wall. Start at the top or bottom and set the laser level to your first line. With that in place, tape along the laser line. Keep in mind that the stripes you will paint will not have any tape covering them and the background color stripes will have the tape sitting inside their edges, so place the tape on top of or below your laser line accordingly (see the image below for help understanding when to tape above and below your laser line). Work your way up or down the wall one laser line at a time. This is really the most time consuming part, so be patient and accurate here y’all.

How to tape out your paint stripes

3. Whew, with that done it’s time for the secret step to ensure a crisp stripe line! In the sections that you want to paint your stripe color (ours was black), first paint a coat or two of your background color (again, ours was white). I know this sounds backwards, but it will ensure that anything that may bleed under your tape edge will be the same background color.

4. Let that backgound color coat dry and then it’s time for your stripe color at last! Paint your stripes with the stripe color and let it dry. Make sure you don’t have any patchy areas… this may require a second coat.

5. Finally once that’s all dry, it’s time to carefully peel off the painter’s tape (no tearing here, despite your unbridled passion) and get served by a striped wall! Oh, Luscious!

Sit back, relax and let those stripes serve you some drama!

Textile Turnout Part 1: the Living Room

Y’all, I’d barely unpacked before I was already shopping for fabrics for our new apartment. Cause y’all know, if there’s ever a legit excuse necessary to give yourselves a home makeover, it’s a move into a new space. A lot of folks work themselves into a full-on panic thinking that buying all new furniture is the only real way to update the look of their homes. Not true. What they need is a Textile Turnout!! By switching out window treatments, throw pillow covers, upholstery and even rugs y’all can completely transform your spaces in the most dramatic & often EASIEST ways!

Once you’ve selected the items you want to turnout, now it’s time to shop! Y’all can go the route of pre-made/store bought, or custom made. Guess which method generally costs more? In either instance, to keep the shopping process from being overwhelming, I try to choose a “founding fabric” or foundation as my starting point. With a strong foundation, it’s easy to build up from there. Your foundation can be anything: a chic set of store-bought curtains, an amazing rug or an awesome throw pillow.

For me, a great print or pattern makes for a strong foundation b/c from it, I can get lots of yummy color cues for the other fabrics in the room. I grew up wearing Garanimals, so I say, “when in doubt, match it out”! If it seems elementary, it is, but you can never go wrong with this theory. Y’all can amp up the glam and sophistication by selecting shades or tones of colors. Also, this is where you can play with textures, other patterns and scale to add drama and depth.

Here’s what I mean…This amazing vintage toile is my founding fabric for valances in our living room: I scored this at Brooklyn Flea several weeks ago for $15 bucks…it’s in great condition and incidentally, is currently one large valance. But with some easy modifications, I’m going to make into two, since we have two windows in the living room. This medium scale print is busy as hell y’all & I love it!!! But paired with simple white panels trimmed in teal twill tape—a color I’m pulling right out of the print-- I’ll be taking y’all there with these window treatments.

But wait, there’s more! Check out this incredible awning stripe (from Premier Prints) I’ll be backslapping our living room chairs with! Oh shiot! The bold graphic stripe will give order to the chaos that is the valances. And y’all don’t even need me to explain why I chose chartreuse…

I’m doing my window screen room divider in this Waverly number:

It’s yummy teal, graphic pattern will help to bring more order to the other side of the room. And b/c it’s smaller in scale, it works well with both the valance & chairs.

The sofa will get this canvas in teal:

A solid is always a super-safe yet smart option, especially with a larger, upholstered piece. I’ll get more bang for my buck here b/c I can always turnout the look of this sofa by updating the throw pillows, when I want to freshen things up. This is why it’s a good idea to limit bolder patterns and prints—especially when it’s custom—to items that aren’t crazy expensive to redo.

Lastly, if any of y’all want some of the fabric goodness that I’ve featured, check out Fabric.com. And even if you hate what I’m doing to my space, y’all should STILL check out Fabric.com. Aside from their amazing selection of really yummy fabrics that are super-cheap, they carry all sorts of other fabric-related items as well as helpful hints on how to measure for yardage needed, etc. And remember: when fabric shopping anytime, ALWAYS get samples BEFORE you buy!!!

And be sure to check back y'all, as I'll be sure to post photos of our fully fabric-dazzled living room once it's finished!

Also if you want sources for any of the items in this post, check the I want that! page for details.

Home Goods Glam!!!

Y'all I've just been backslapped by Home Goods! I've always known there could be all kinds of cuteness to be had at the ole Home, but I was just taken there again by all kinds of glamour when I stopped in recently. How much do y'all want these super-cute Kate Spade plates?


And y'all know WHATEVER you serve on this striped platter will look great, even if it actually tastes like skank:


These goodies range in price from $9.99 for the appetizer & solid band rim plates, $12.00 for stripped & polka dot plates & $39 for the stripped platter...gorg! Oh, But wait y'all, there's more!! Check out this garden gnome? Shut the $&ck you, Home Goods! Are y'all serious?


And this owl ceramic stool/side table, um, yes please!


These cuties could be considered too kitschy, but since they're done in all-white ceramic, they're just this side of class & could make for the right touch of whimsy in almost any space! I said whimsy! Speaking of class, Home Goods is also serving us this sassy number:


So y'all, if you're itching to add some affordable glam to your spaces for the new year, take yourselves to Home Goods now! They're dishing out huge heaps of style and I know y'all are hungry!! Meow!!!


Gettin' my thrift on!


Y'all one of my ABSOLUTE favorite things to do is hit the thrift stores for treasures! And no time is more perfect for hunting than over the holidays, especially when my holiday travels take me to exotic destinations, such as Birmingham, AL! Birm-a-dazzle, y'all! In general, when thrifting, you never know what you'll find, but it's even more unpredictable when you shop in stores in a town that you're visiting. In these scenarios, it's that much more thrilling b/c you have no way of knowing which stores will yield amazing bounty. So, all this uncharted territory makes for some incredible finds. Take these items pictured here, scored at the Goodwill


All of these things I picked up primarily for use on prop styling gigs, but I'll put that super-cute recipe binder to good use right away, especially since it cost me all of sixty-five cents!! Oh bargain Holla!! And that little metal black tray (which is part of a set of three) will take me there as a seventy-five cents triptych in our kitchen!!! So, y'all, don't forget no matter where your travels take you, there's plenty of bargain treasures to be had at the thrift stores!

I've Been Framed!

I love having lots of artwork on my walls. I think it’s a relatively easy way to inject all kinds of style and drama-glam into one’s space.  But y’all watch out,  ‘cause what you choose to hang on your walls, says a lot about who you really are! It’s kind of like a window display into your soul!  So keep that in mind when you’re debating about where to hang that velvet Elvis painting, holla! I certainly have no problems letting my soul glow by way of my artwork display, but where I get snagged is having things framed! Custom framing ain’t cheap, y’all! Since my artwork usually comes from trolling thrift stores and flea markets (in other words, it's cheap), I don’t necessarily want to spend a lot of money on having it framed. It’s also a time issue… it can take several days to have something framed (that’s if I remember to haul it to the frame shop) and like most folks, I just want that project done yesterday!

Sweet desertscape awaits it's new home

Well, wait y’all, there's more: Store bought frames and mats! For my funky little paint by numbers desertscape, which I scored for a mere .35 cent at a Goodwill store (Goodwillla Goodness!), I bought this frame from West Elm, on special for $30 (take us there, West Elm value!). I love how clean and modern the all-white frame and mat will look against the chaos of colors this little painting is serving us!  There are tons of places that sell similar frames with pre-cut mats, here a few that I like: Pottery Barn, CB2, Zgallerie.

My painting was slightly larger than the 8 x 10 opening in the pre-cut mat, so I just took it to my local frame shop to have it cut to fit! For a mere $3, Darrin at Prints Charming (yes, y’all that’s the real name, I can’t make this genius up, call him: 718-230-8118) explained that he could trim the mat to fit my painting while I waited! Now that’s called service!

BUT- sad panda spoiler alert- there was a slight problem! He discovered that the pre-cut 8 x 10 opening was intended for vertical display only b/c the mat was smaller on top and bigger on the bottom, meaning it would be off-center horizontally.  Oh, y’all, who knew framing could sound so raunchy?!  There would be no way we could properly frame my desertscape horizontally by using this pre-cut mat! What, horrors! I didn’t even notice this when I bought the frame! BUT, tragedy turned triumph when for only $16, he cut a brand new mat and it looks amazing! Check it!

Custom home sweet home!

So, even though I’d have much rather paid $3 to have Darrin trim the store bought mat, the $16 I did spend, added to the cost of the frame, still brought me way under what Darrin said would have been a $108 custom frame job! I think that’s awesome! Plus, there’s added value here for y’all learning from my oversight…be sure to double check the store bought frame & mat against the orientation of the artwork you intend to place in it. Y’all know how controversial orientation can be!