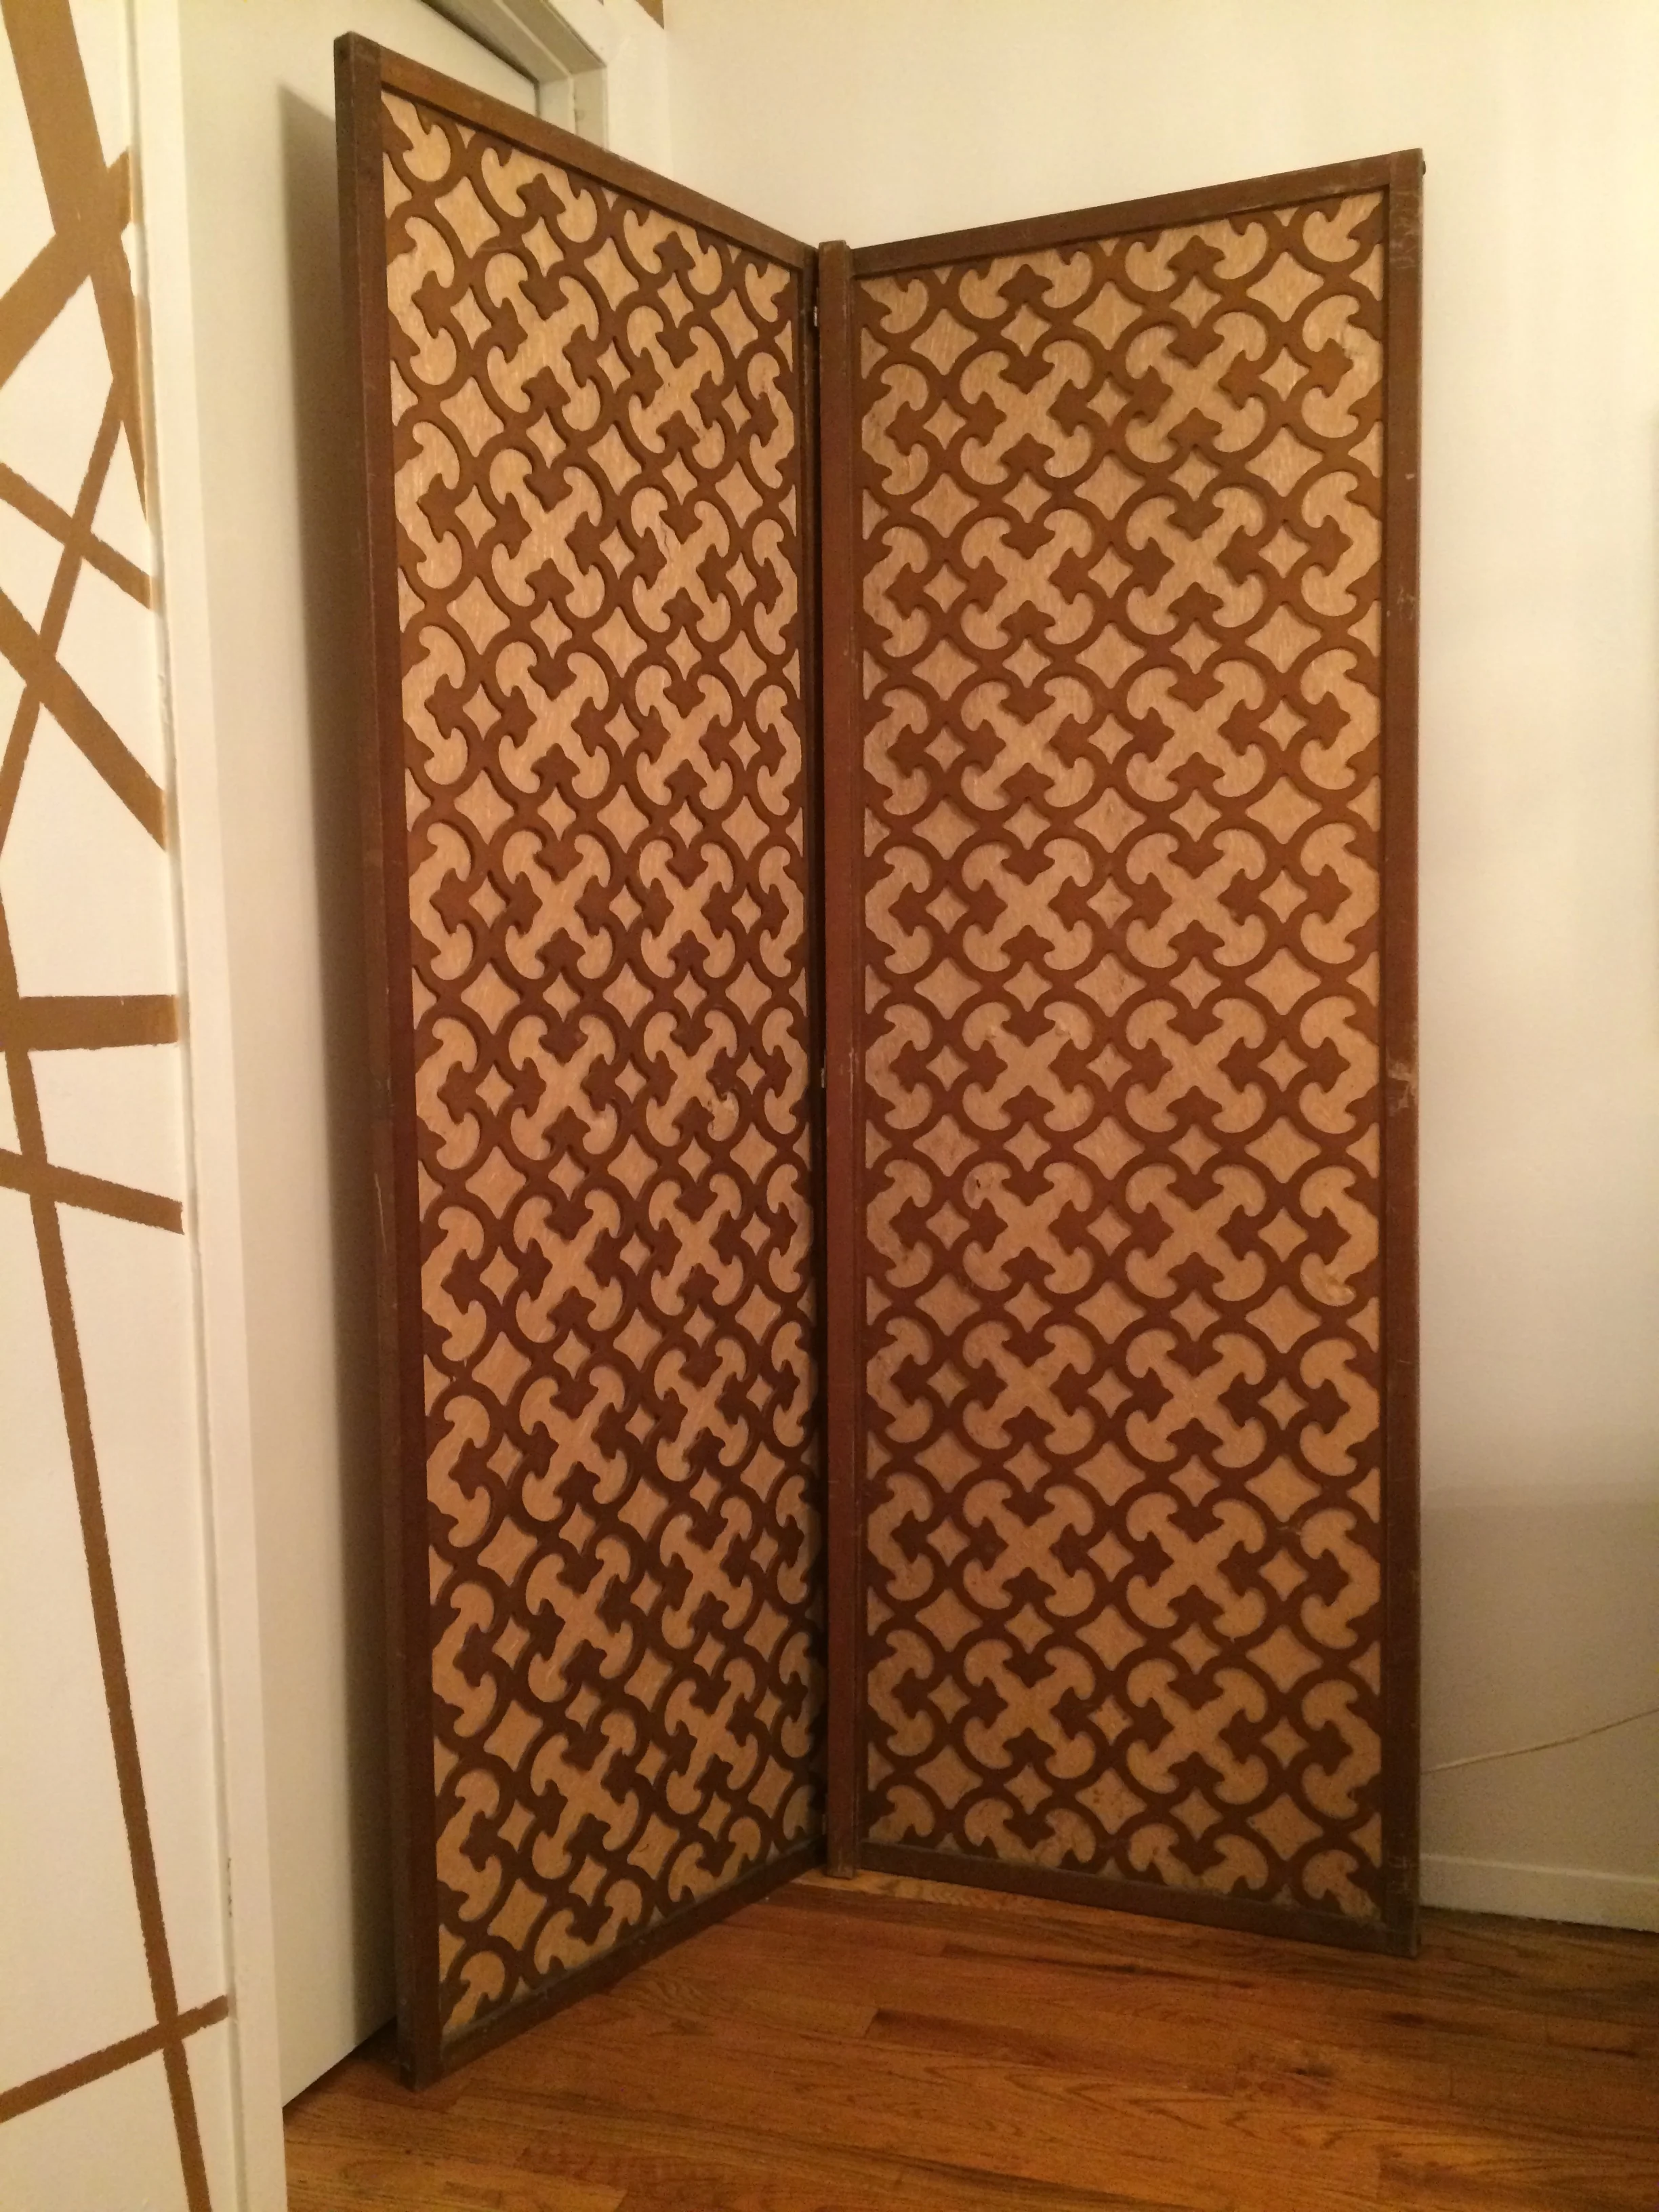
Ohhhhh yasssss, y'all! So, I scored this AMAAAZE mid-century folding screen for a client off craigslist-- and it's dripping with all kinds of juicy HAWTNESS:
Can y'all?...STAND...IT?
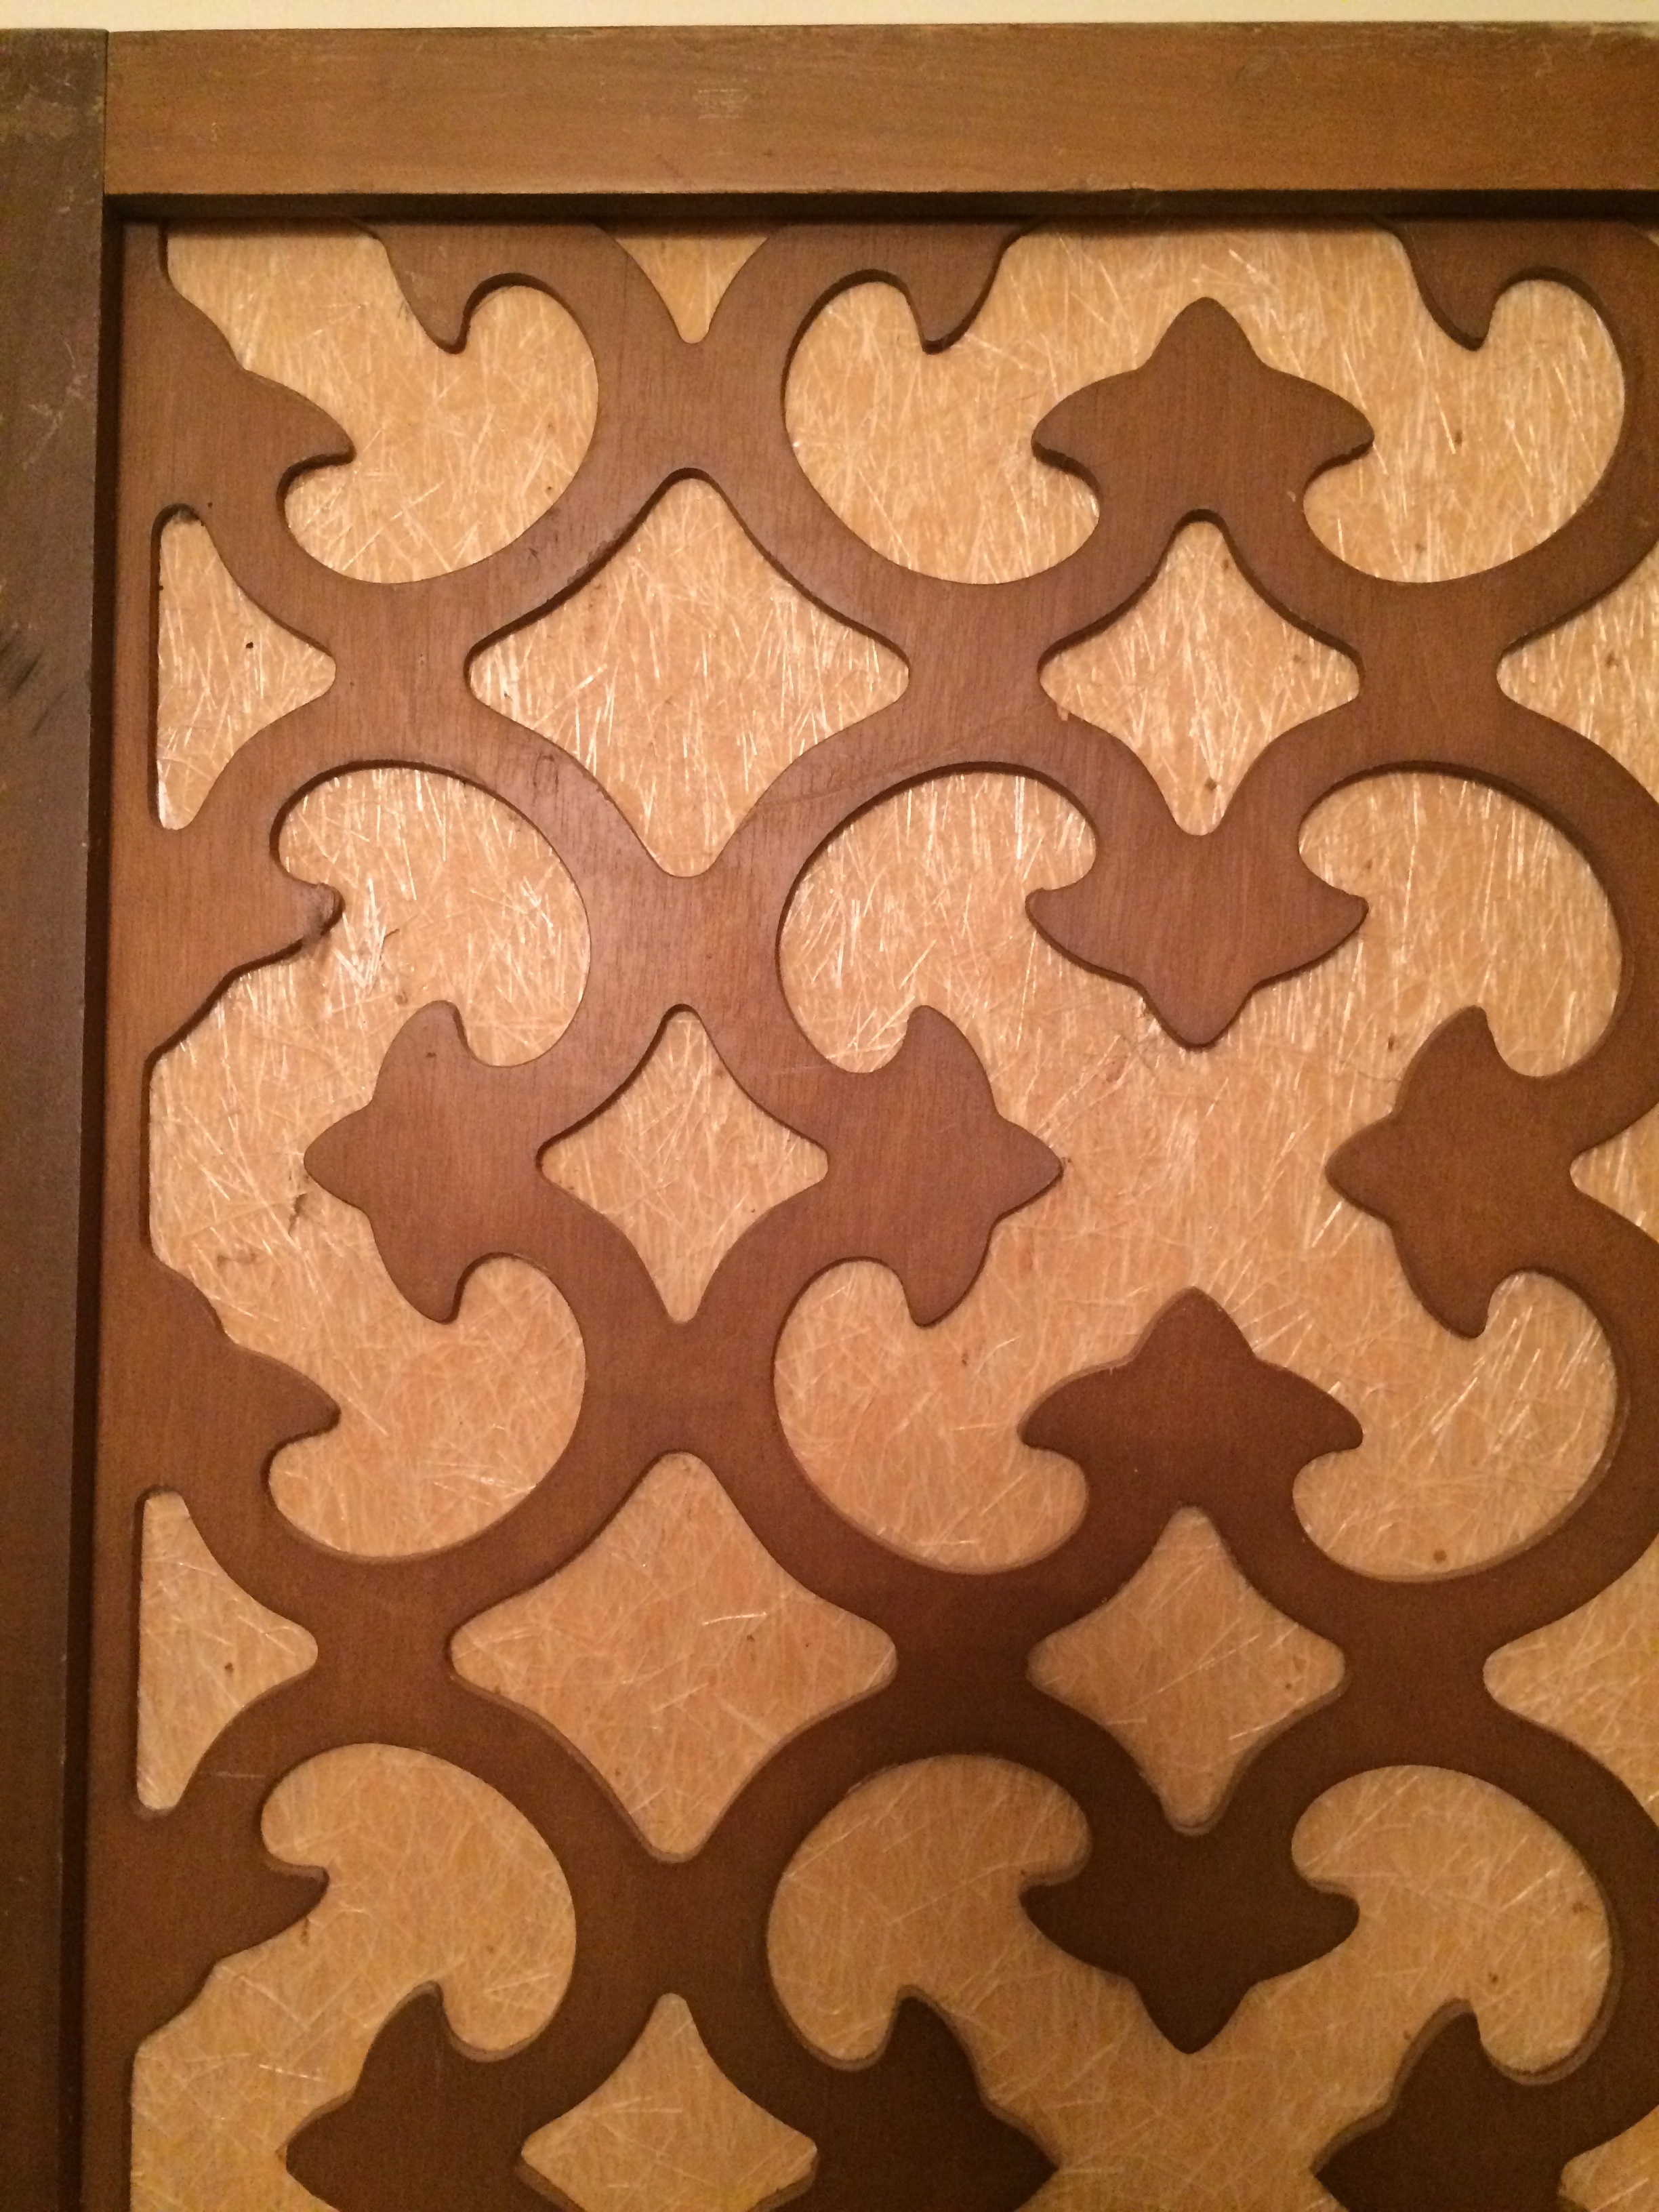
SHUT the F&$K YOU w/all this FRETWORK-- Betch!
Lurv me some good folding screen action in a space...the plan for this lovely is to unhinge the panels & lean two of them on either side of the media center, like this:
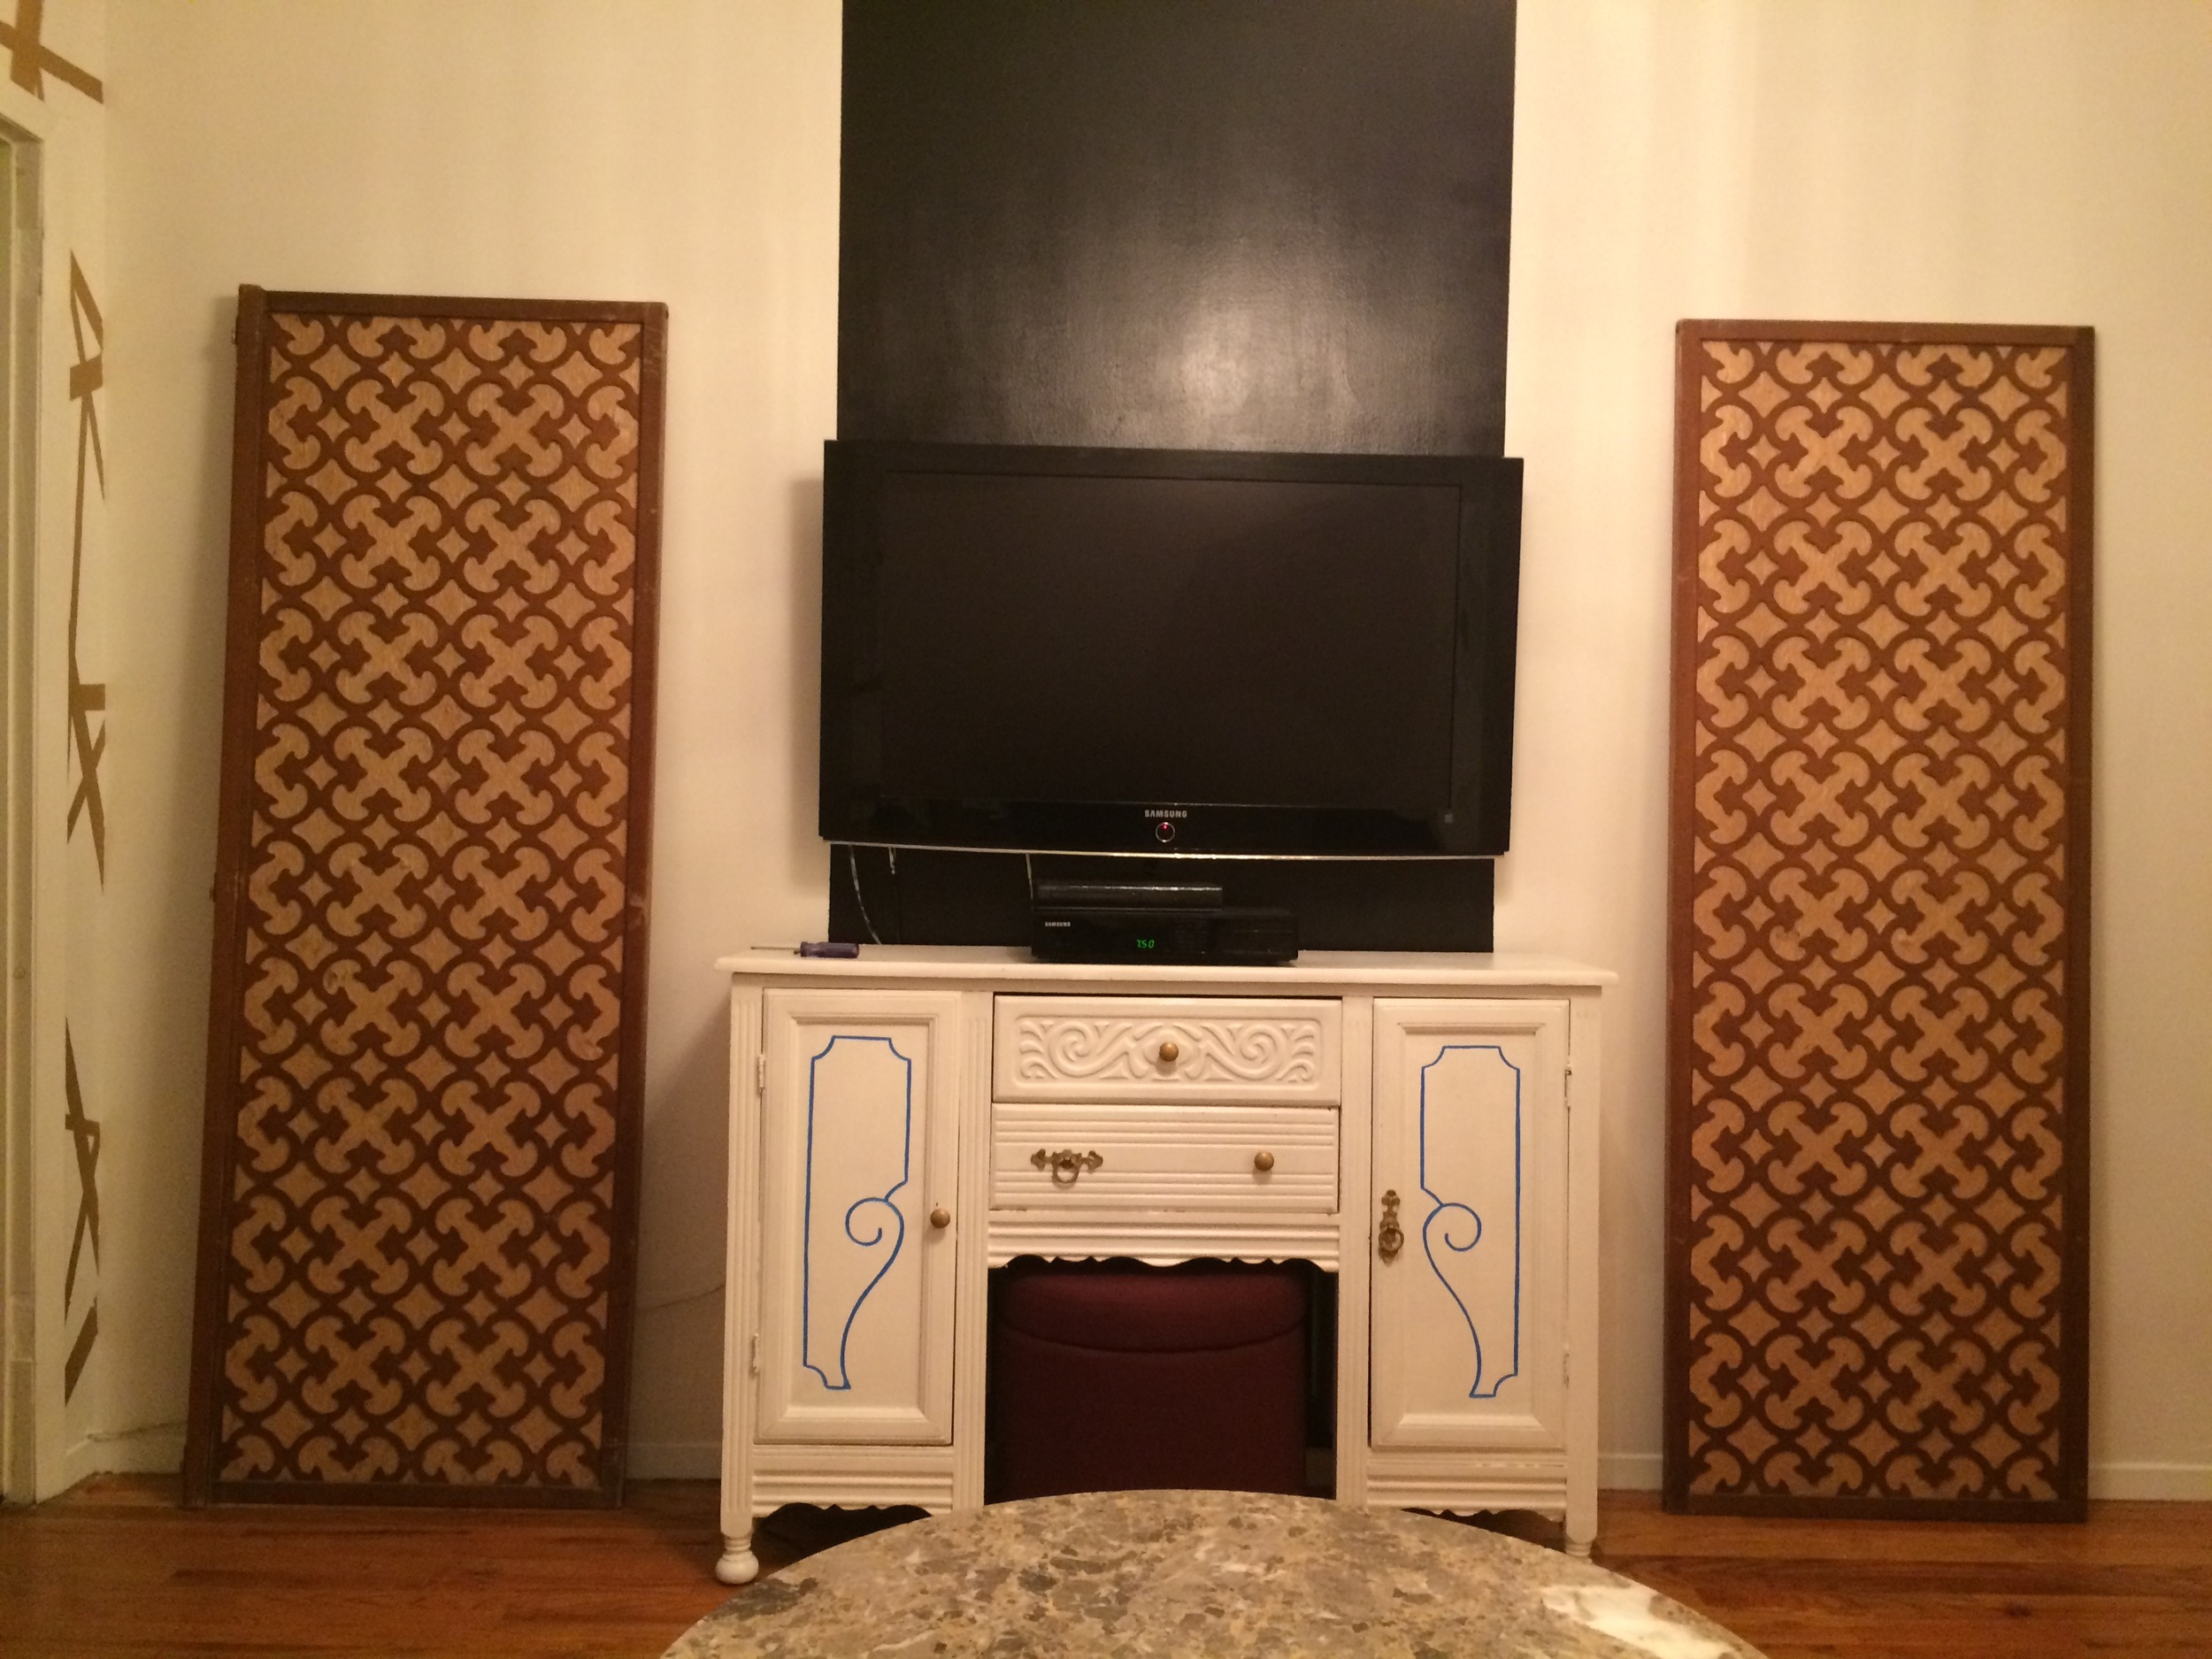
That tv stand is all kinds of wrong, y'all, but she's been PJ DIY'd since this pic
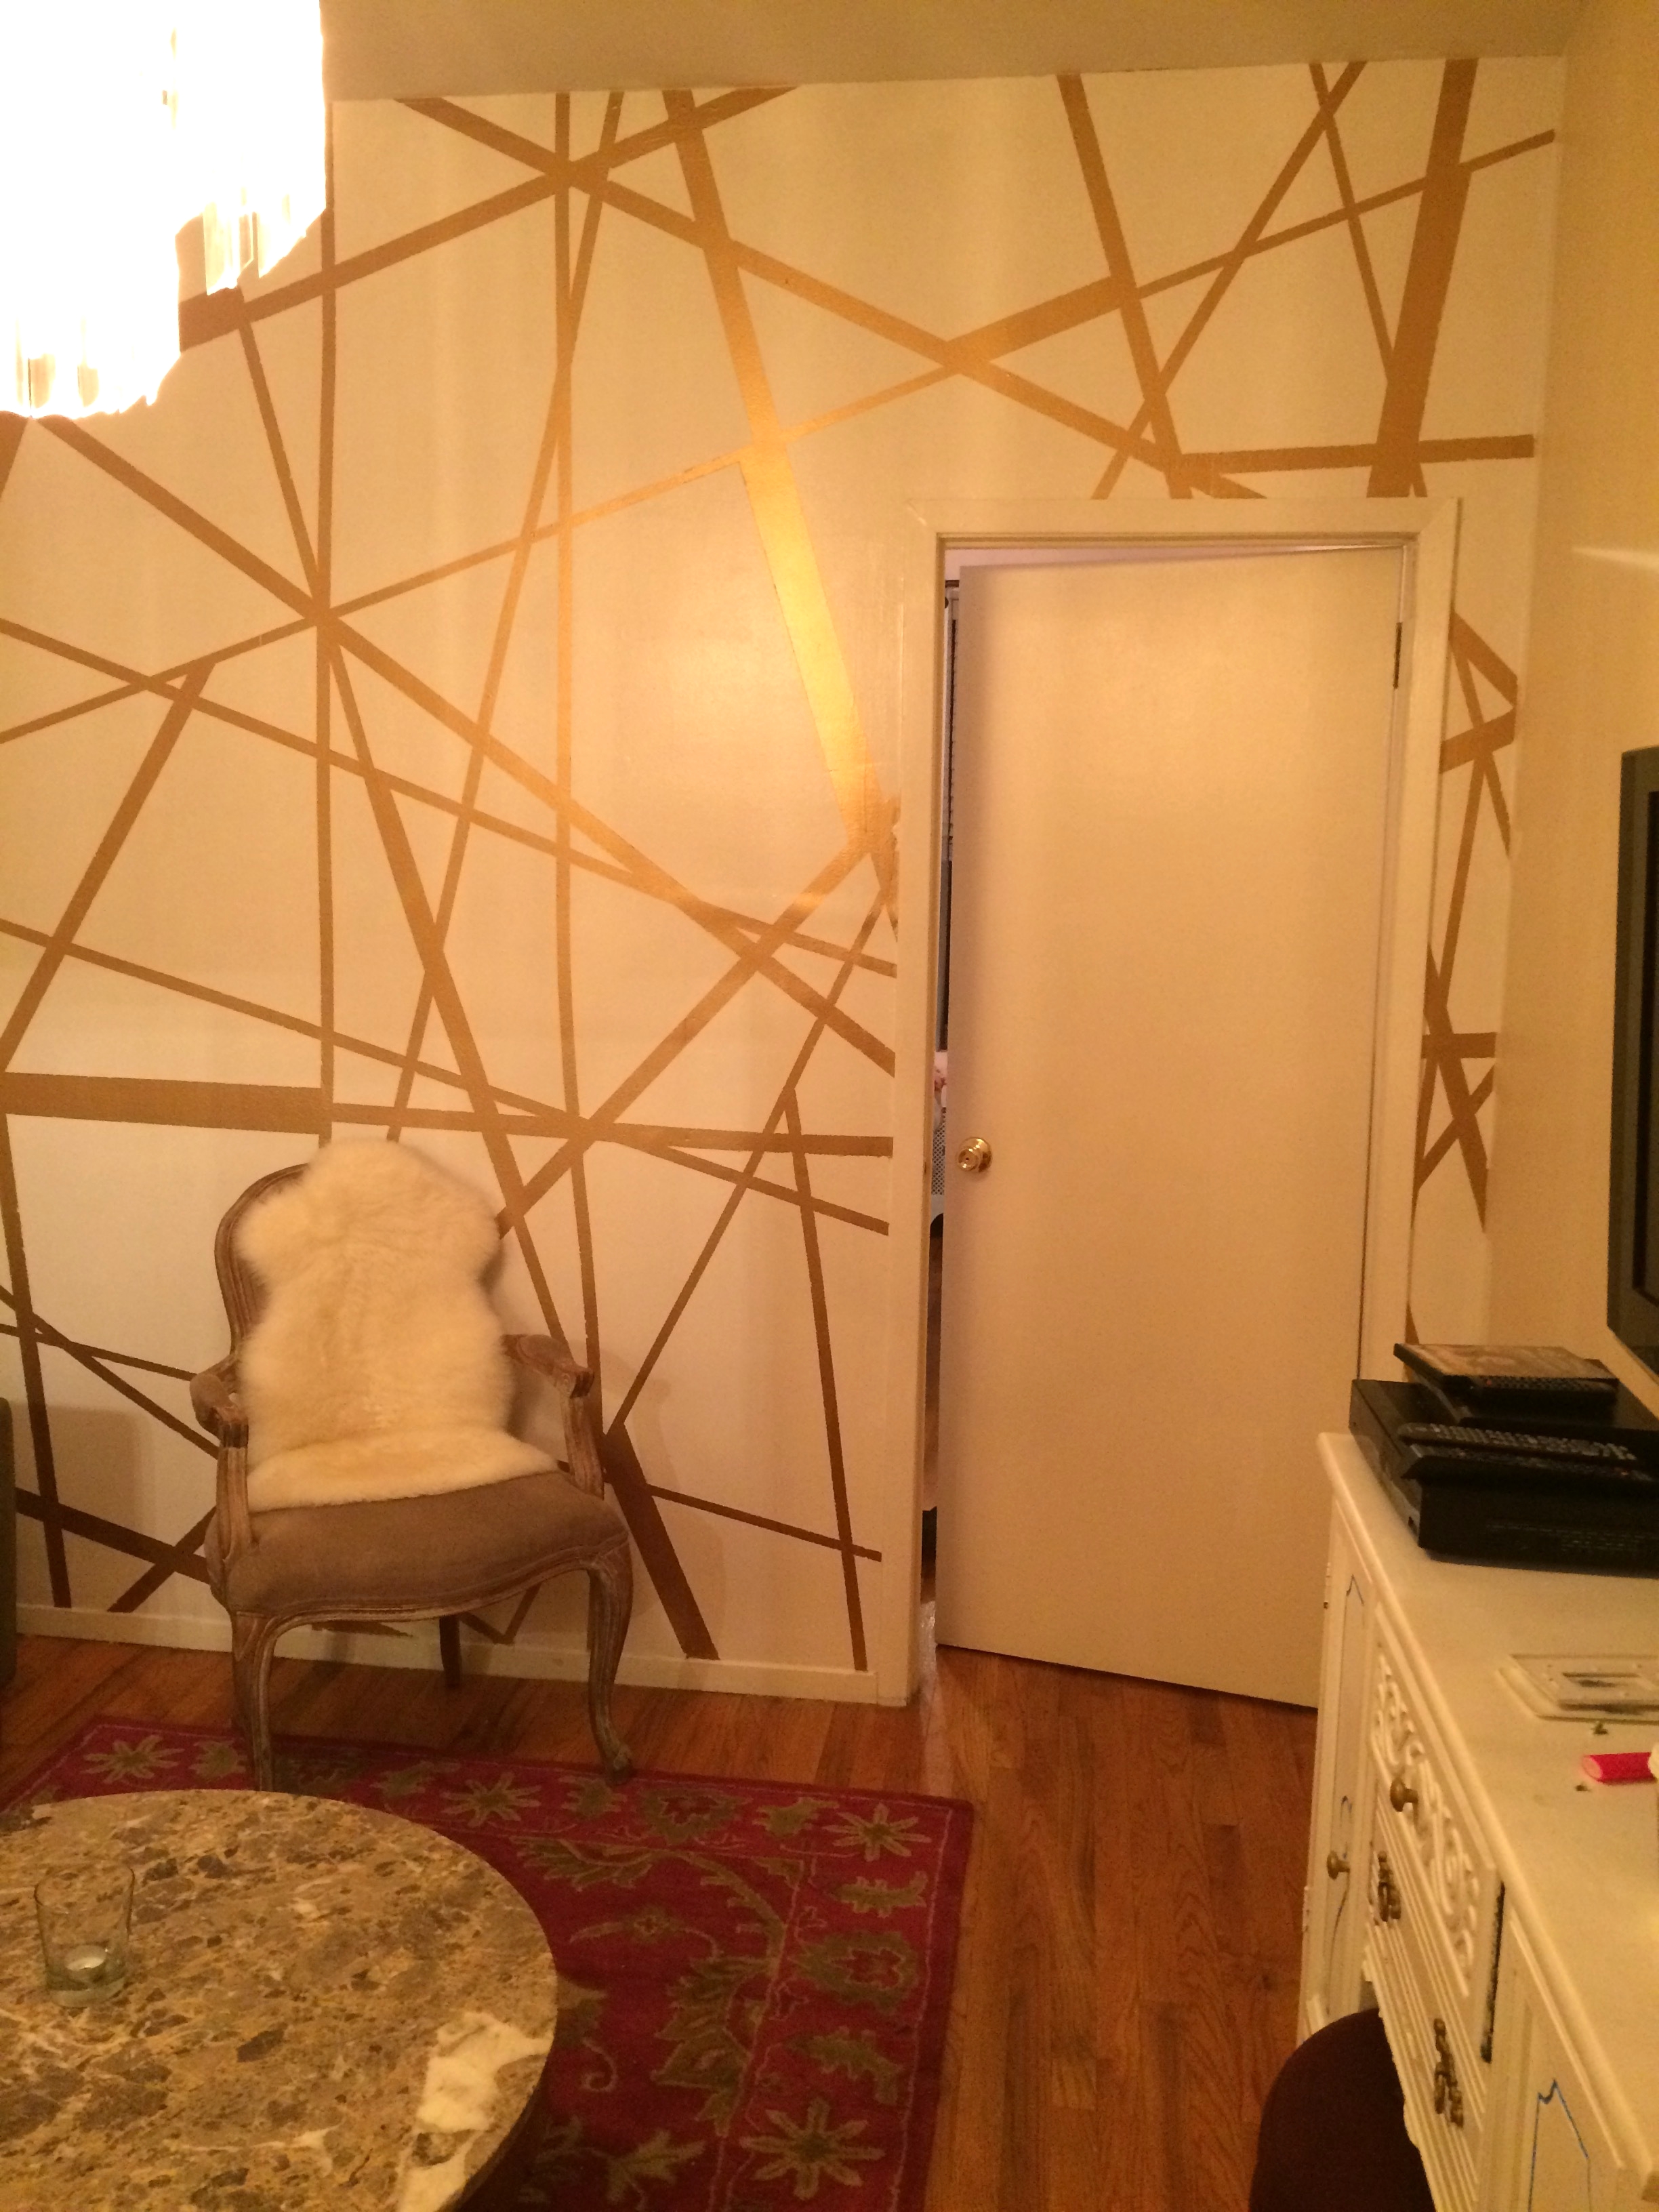
This gives this side of the room some needed visual interest & balance b/c of the fab wood fretwork in the screens AND the symmetry. 'Cause in case y'all hadn't noticed, or seen my other posts about this space (read some here , here & here ) there's ALL KINDS of drama glam going on elsewhere in this room...like this:

And this:
Oh & this too:

mmm K? So bringing some visual balance to this side of the room is necessary. ALSO-- b/c this living room has to do double duty as my clients' home office for meetings, presentations, etc., both of these screens are getting retro-fitted!!! WTF does THAT mean? One side of one screen will flip over to reveal a bulletin board & one side of the other screen will flip to reveal a dry erase board! YASSSSSSS! Let's get into this PJ DIY pronto!

*I wanted maximum pinning/bulletin board space for my client, so I'm covering the entire 2'wide x 6' high (approx) area within the screen frame w/cork. Did y'all know you can get cork on a roll for projects like this? I got mine online from School Outfitters ...After carefully unrolling it from tube, and smoothing out repeatedly, I set cork on top of screen to fit it. Since one side of cork roll was a factory cut, it was straight-- that's the side I placed just inside the screen frame & used as my straight edge to mark the other side of frame from. Make sense?
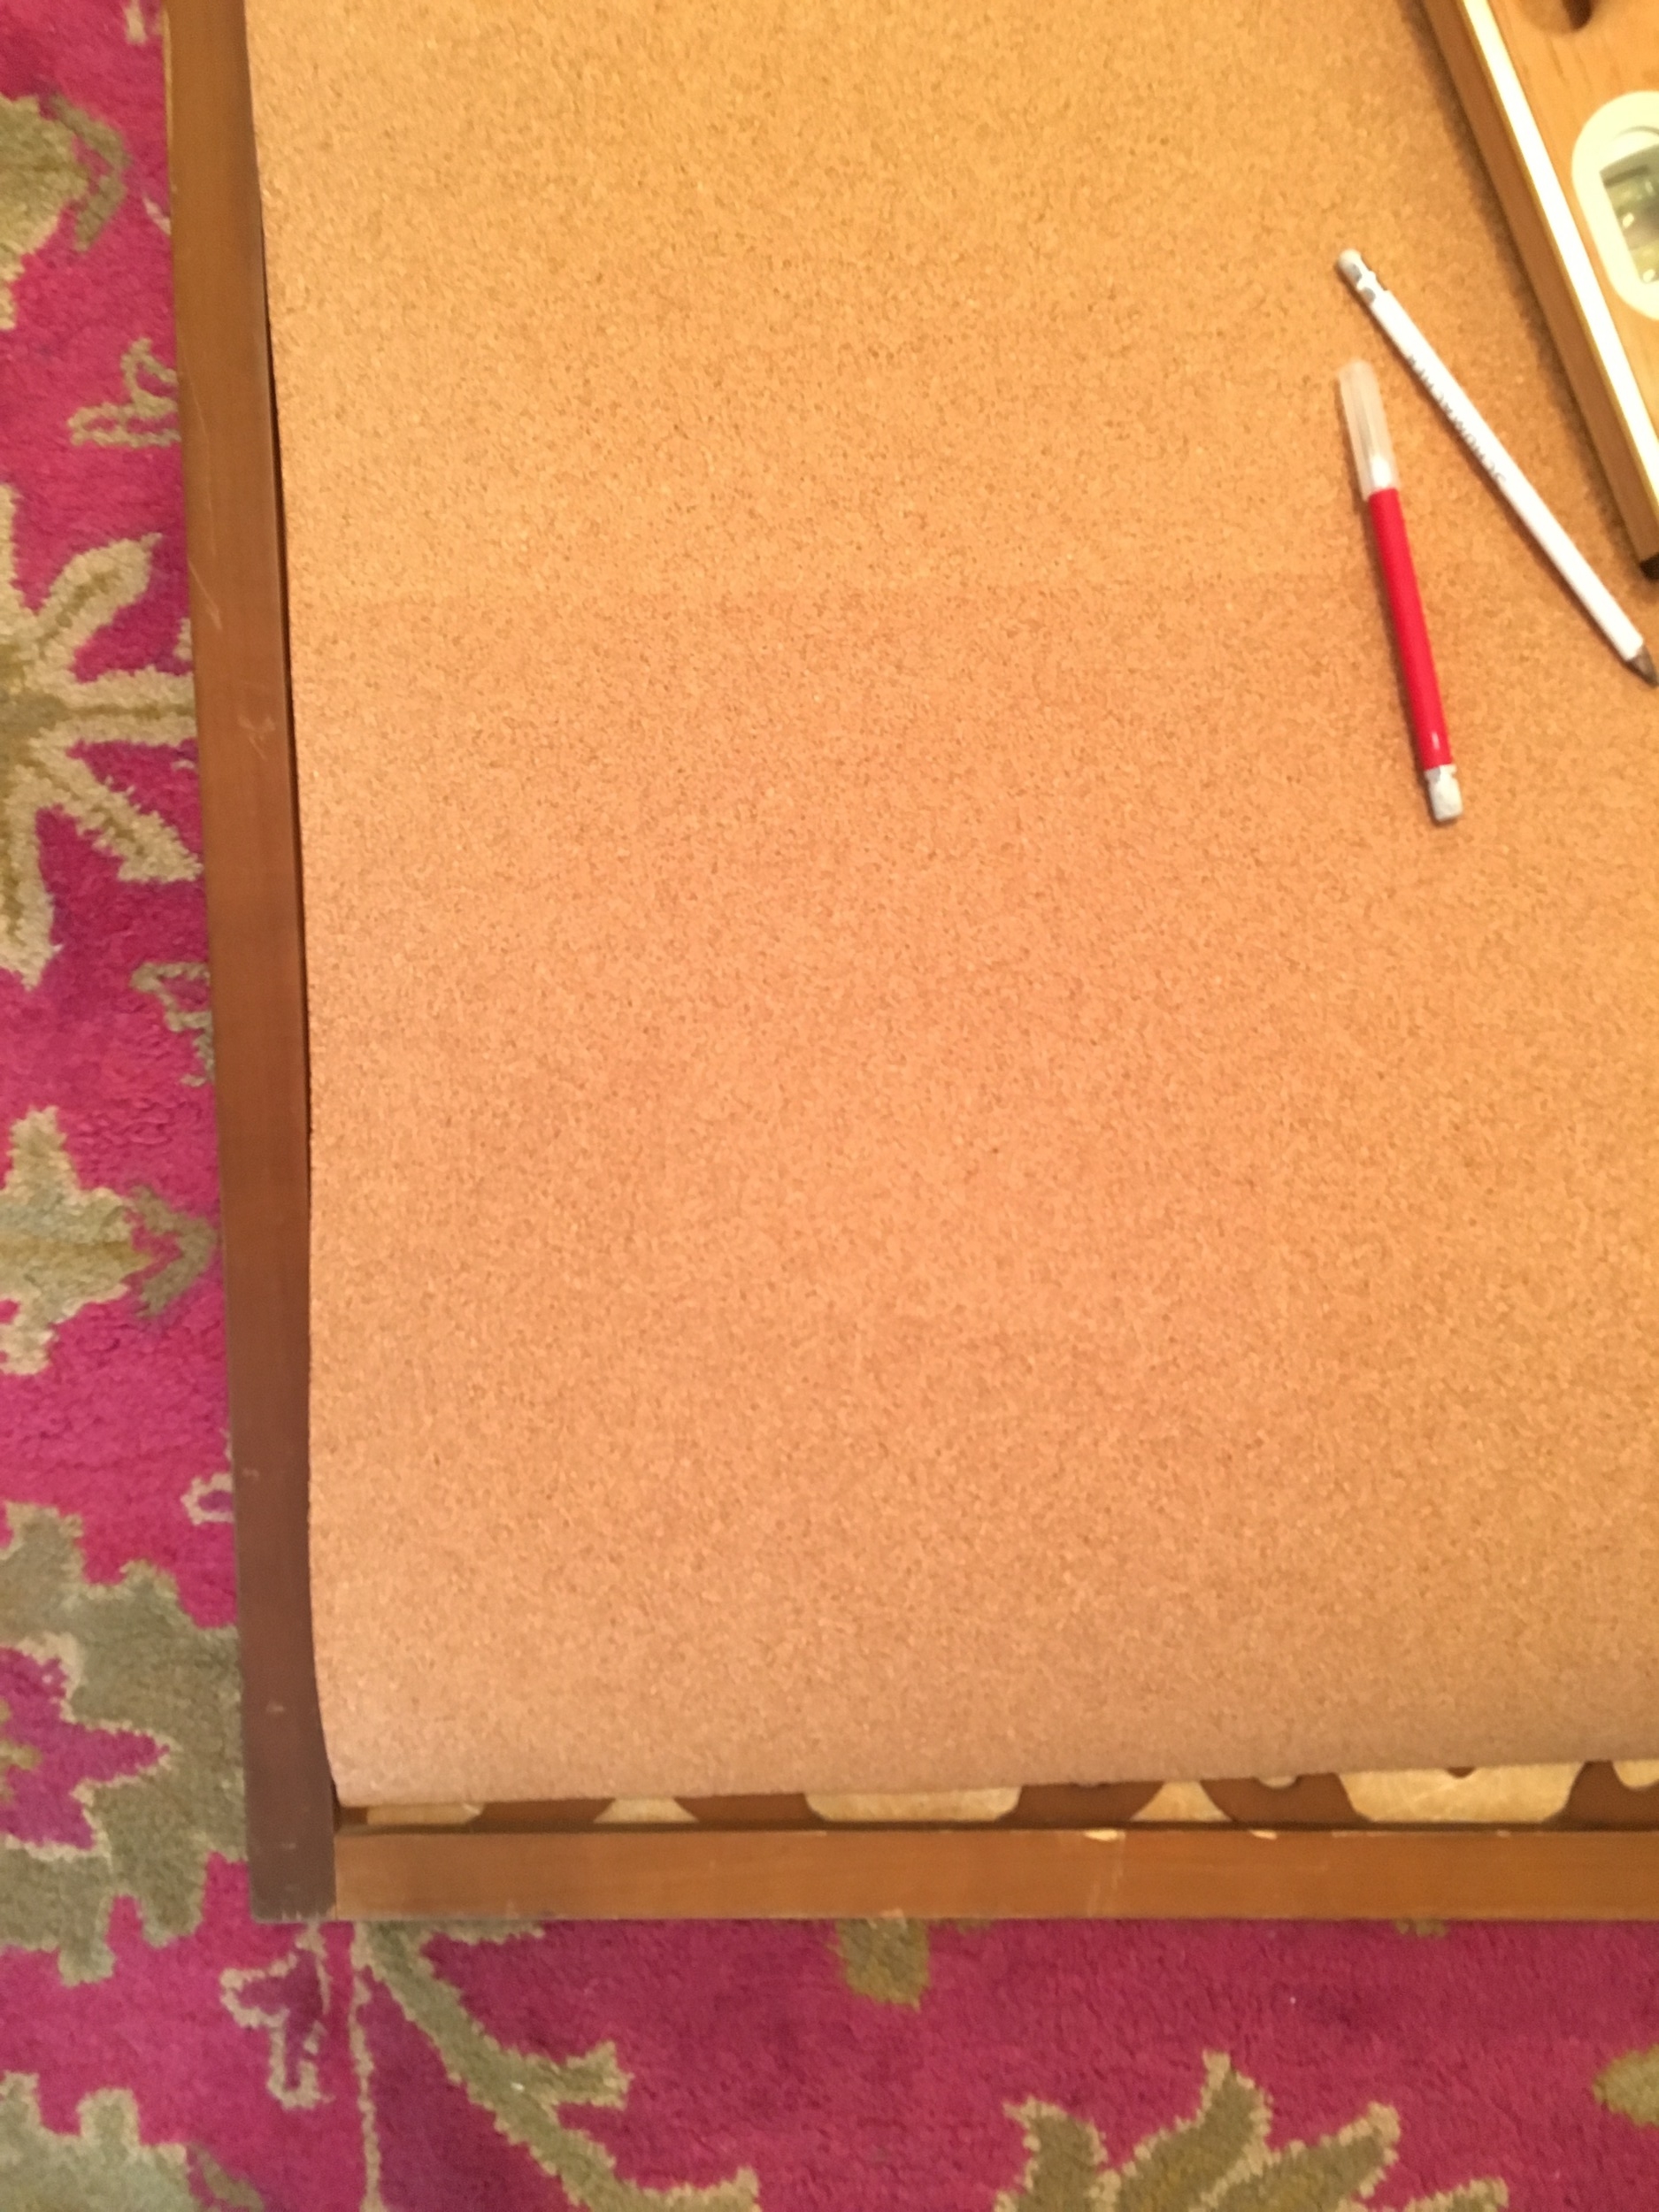
*I used a level & pencil to make my cut mark along the opposite straight side & carefully cut with an exacto knife...though tedious b/c I wanted to get as straight a line as possible, the actual cutting was really easy. Then I went to town w/some liquid nail (adhesive) all over the screen:
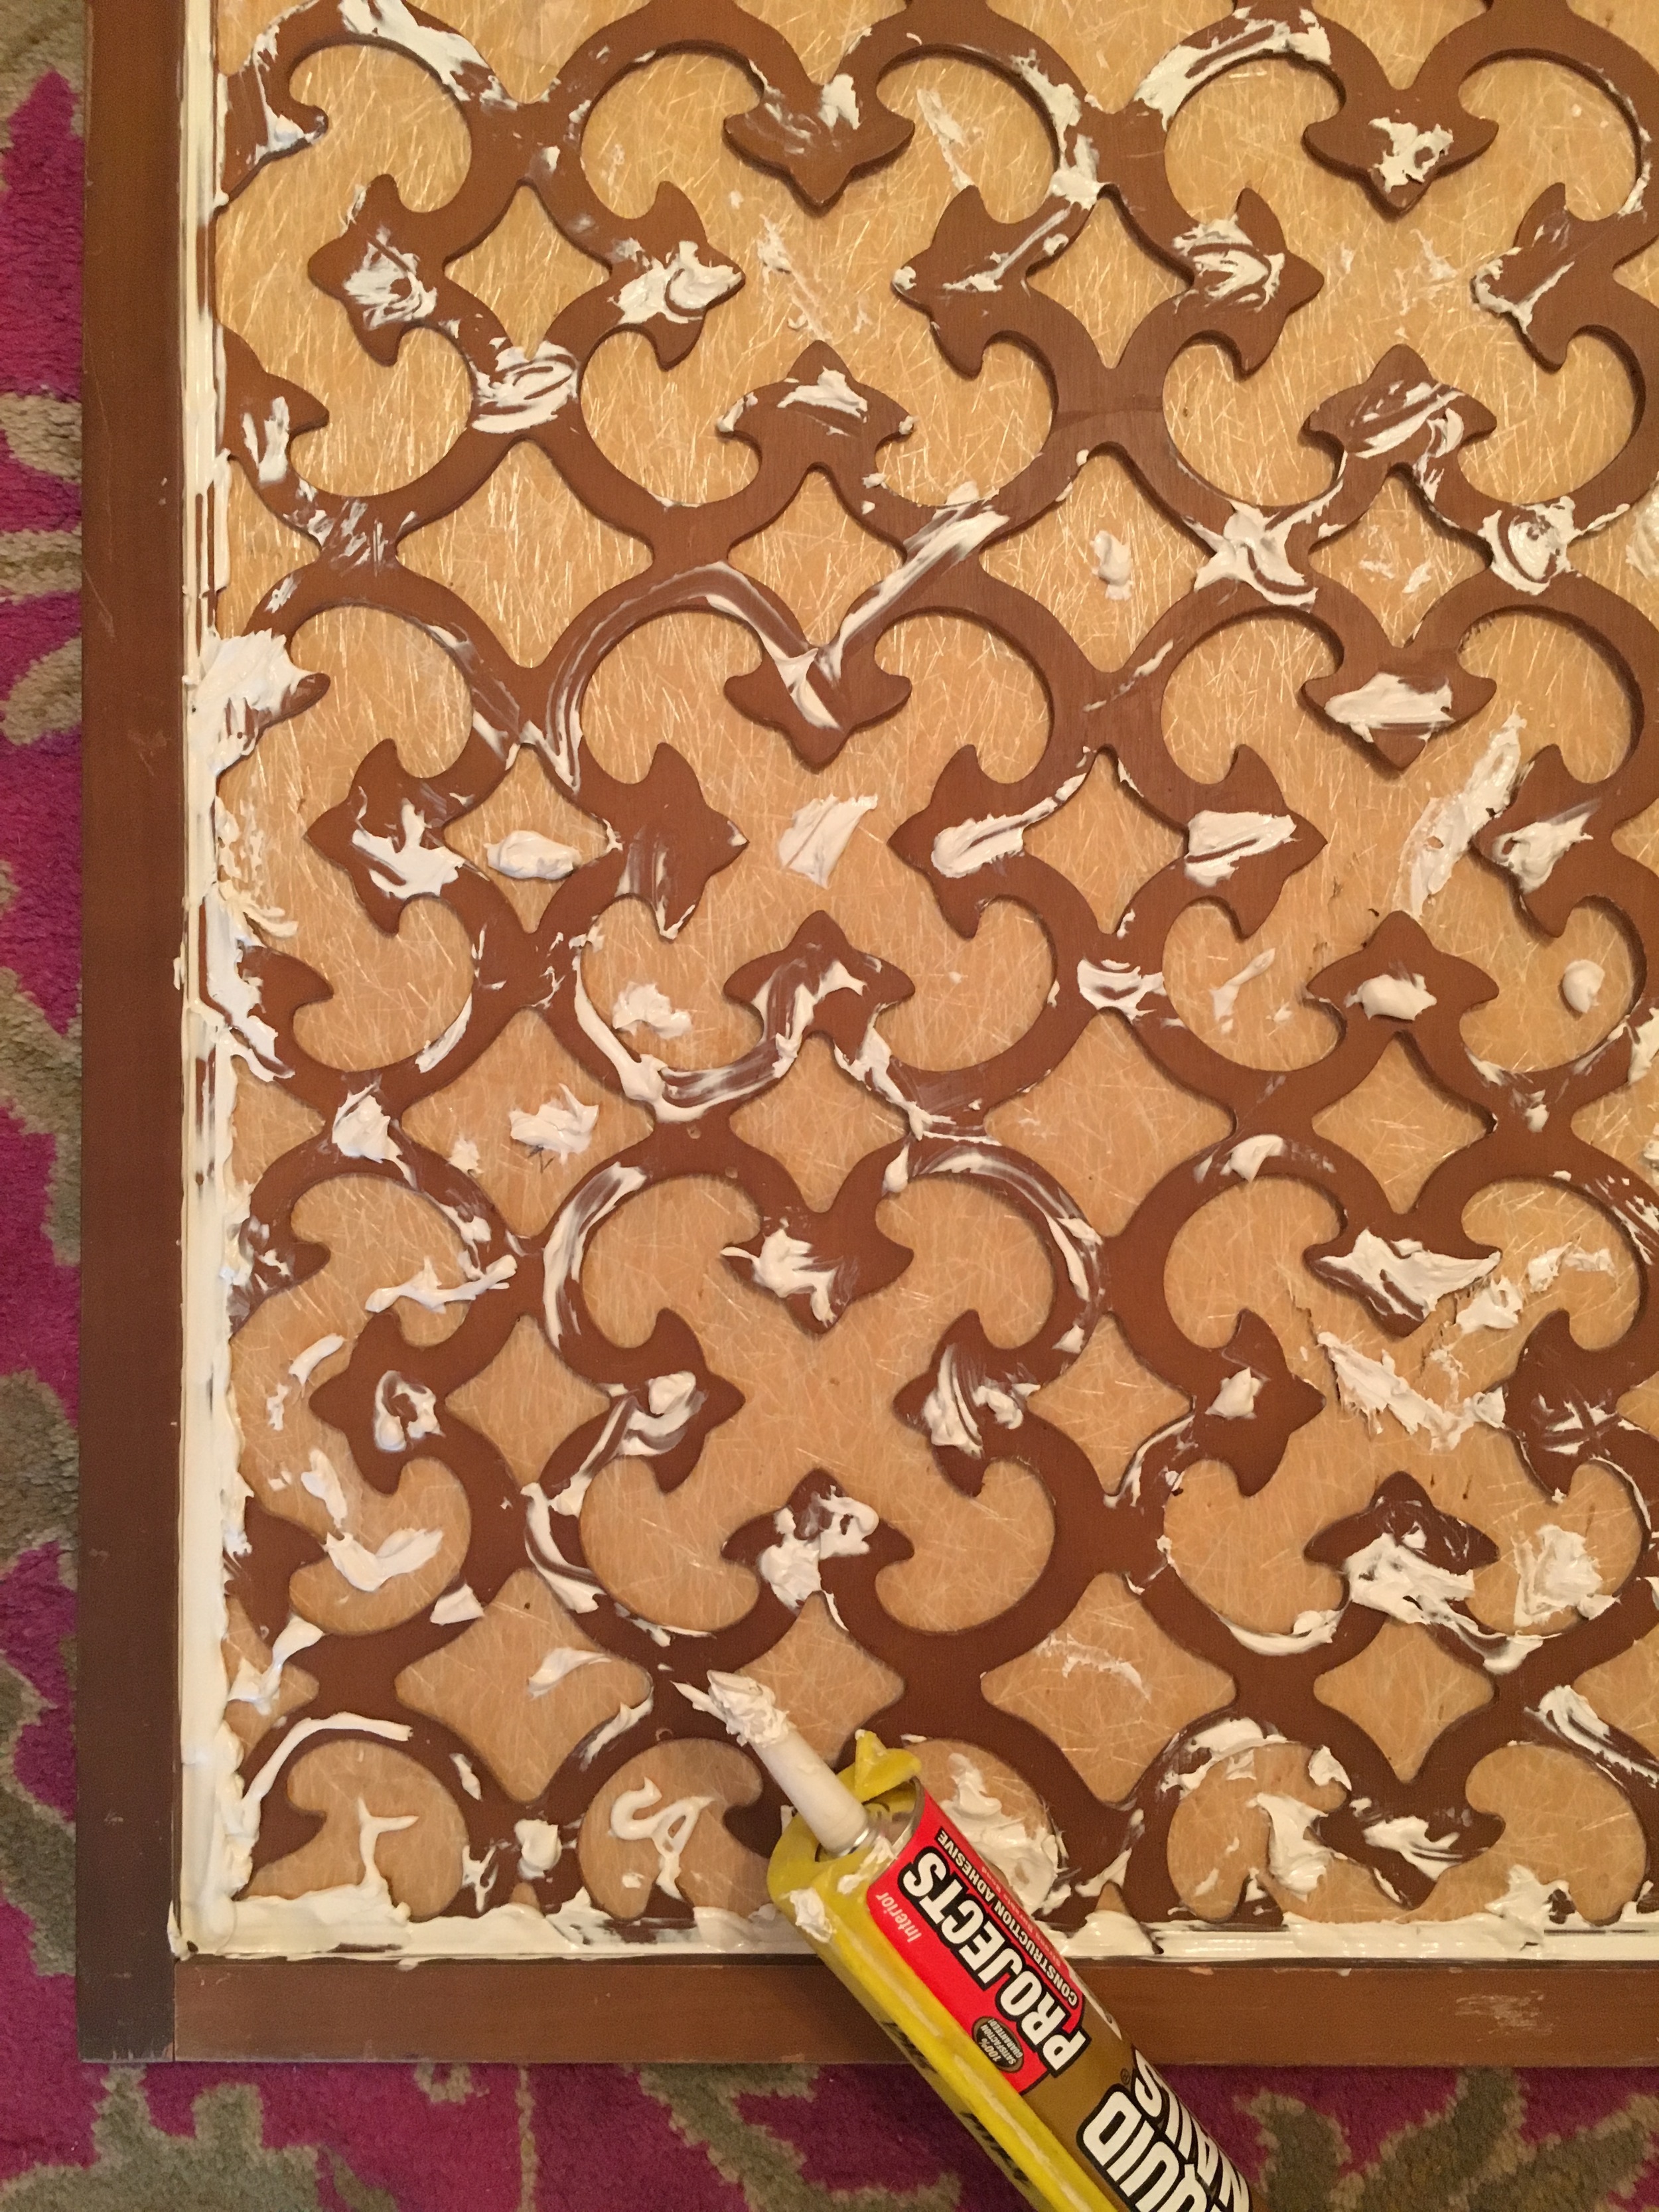
Be sure to to get in ALL those nooks and crannies!
*Next I carefully placed the cut piece of cork onto the glued screen & smoothed it out with my hands...b/c the screen isn't a solid surface & I wasn't about to stay there for hours while the liquid nails dried...I scrounged around my clients' apt grabbing every single heavy object I could find to secure this cork roll in place...y'all know that's how experts do:
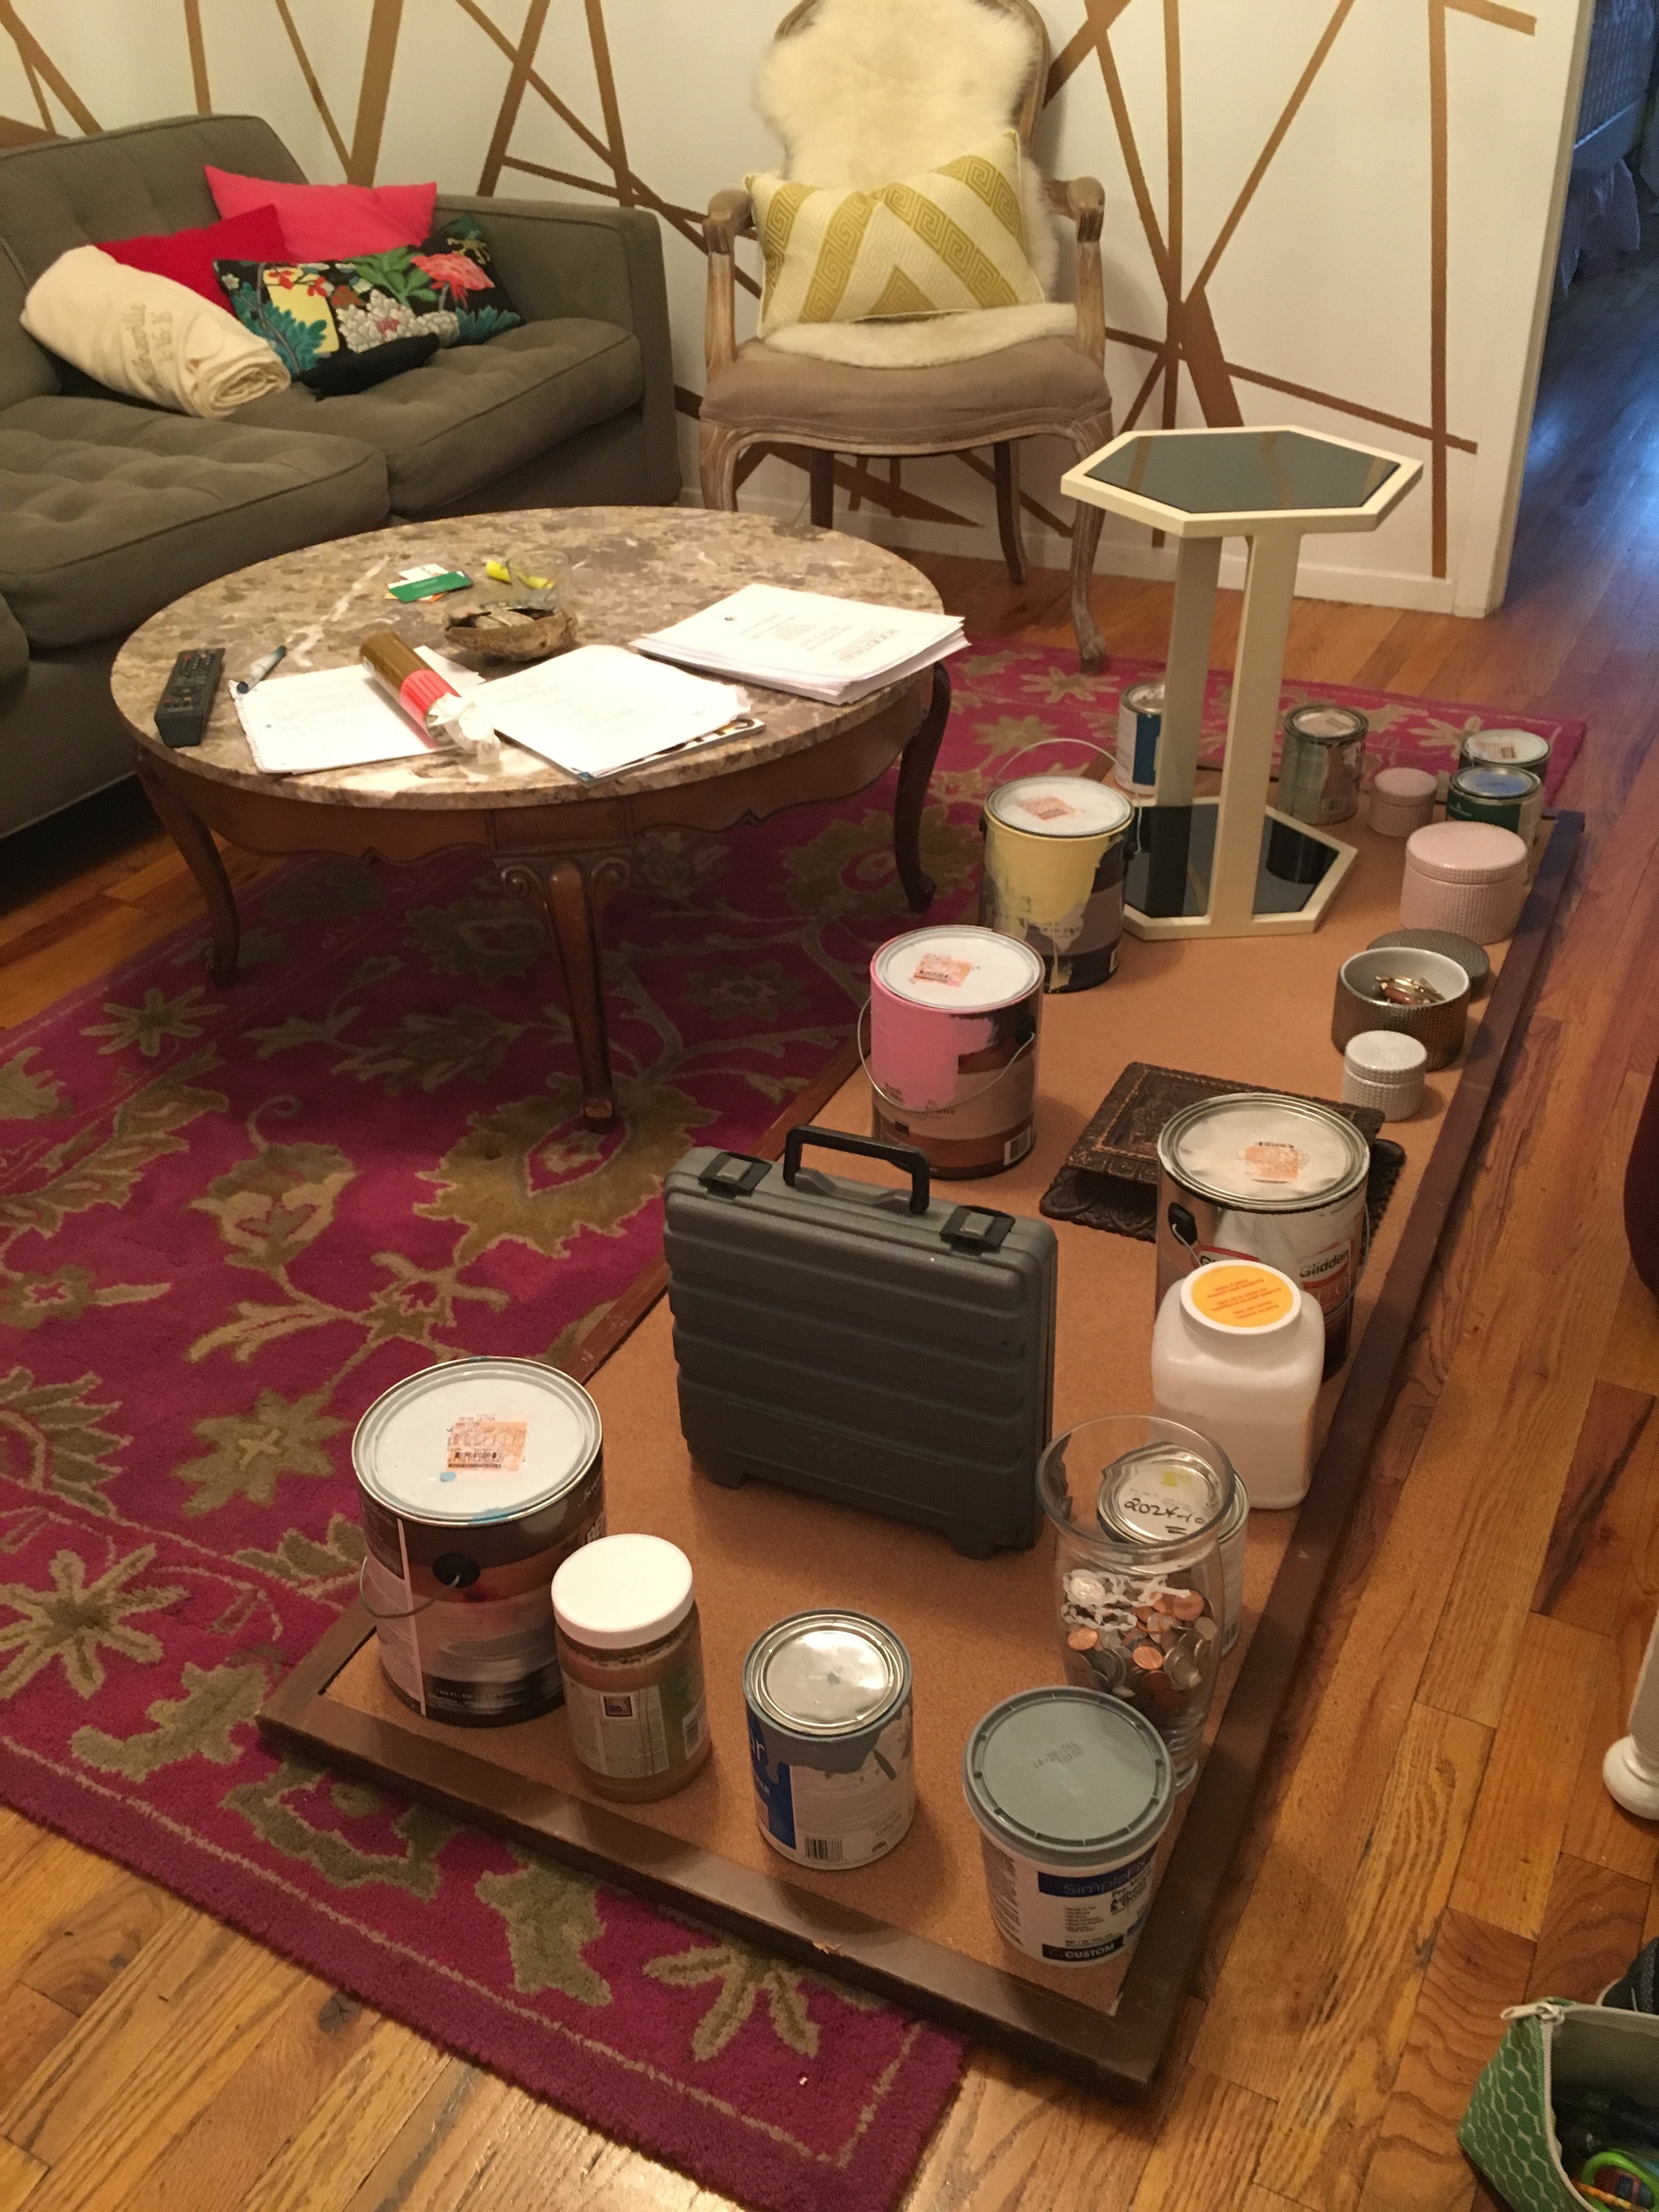
This is a HAWT mess of heavy shiot-- but it WERKED!
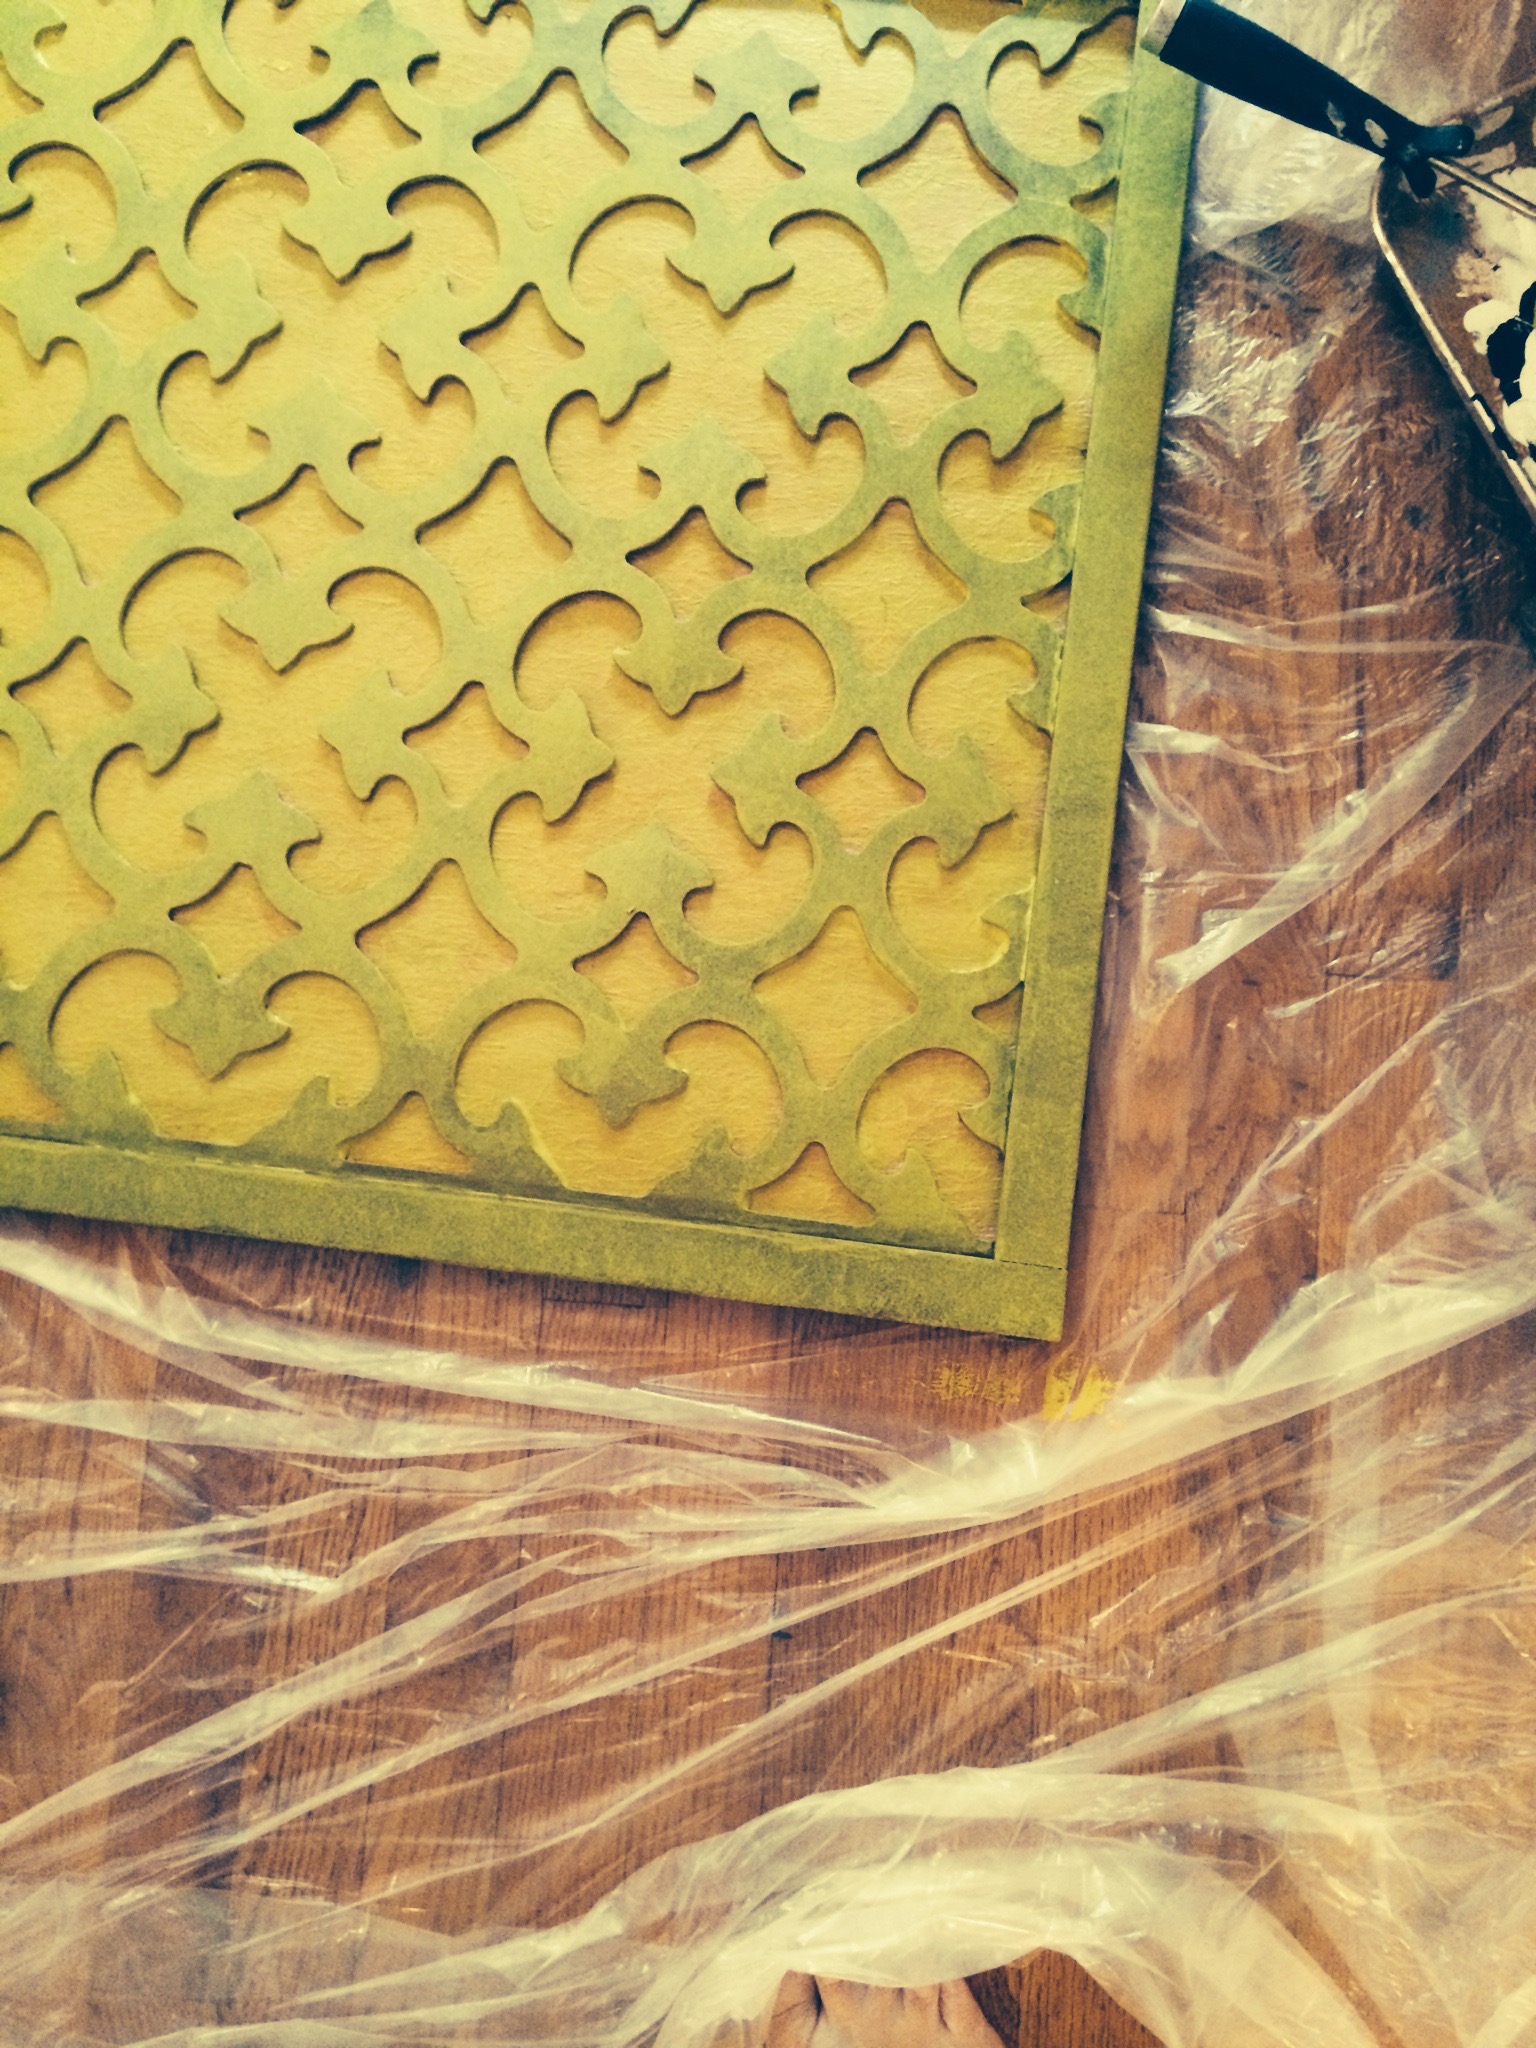
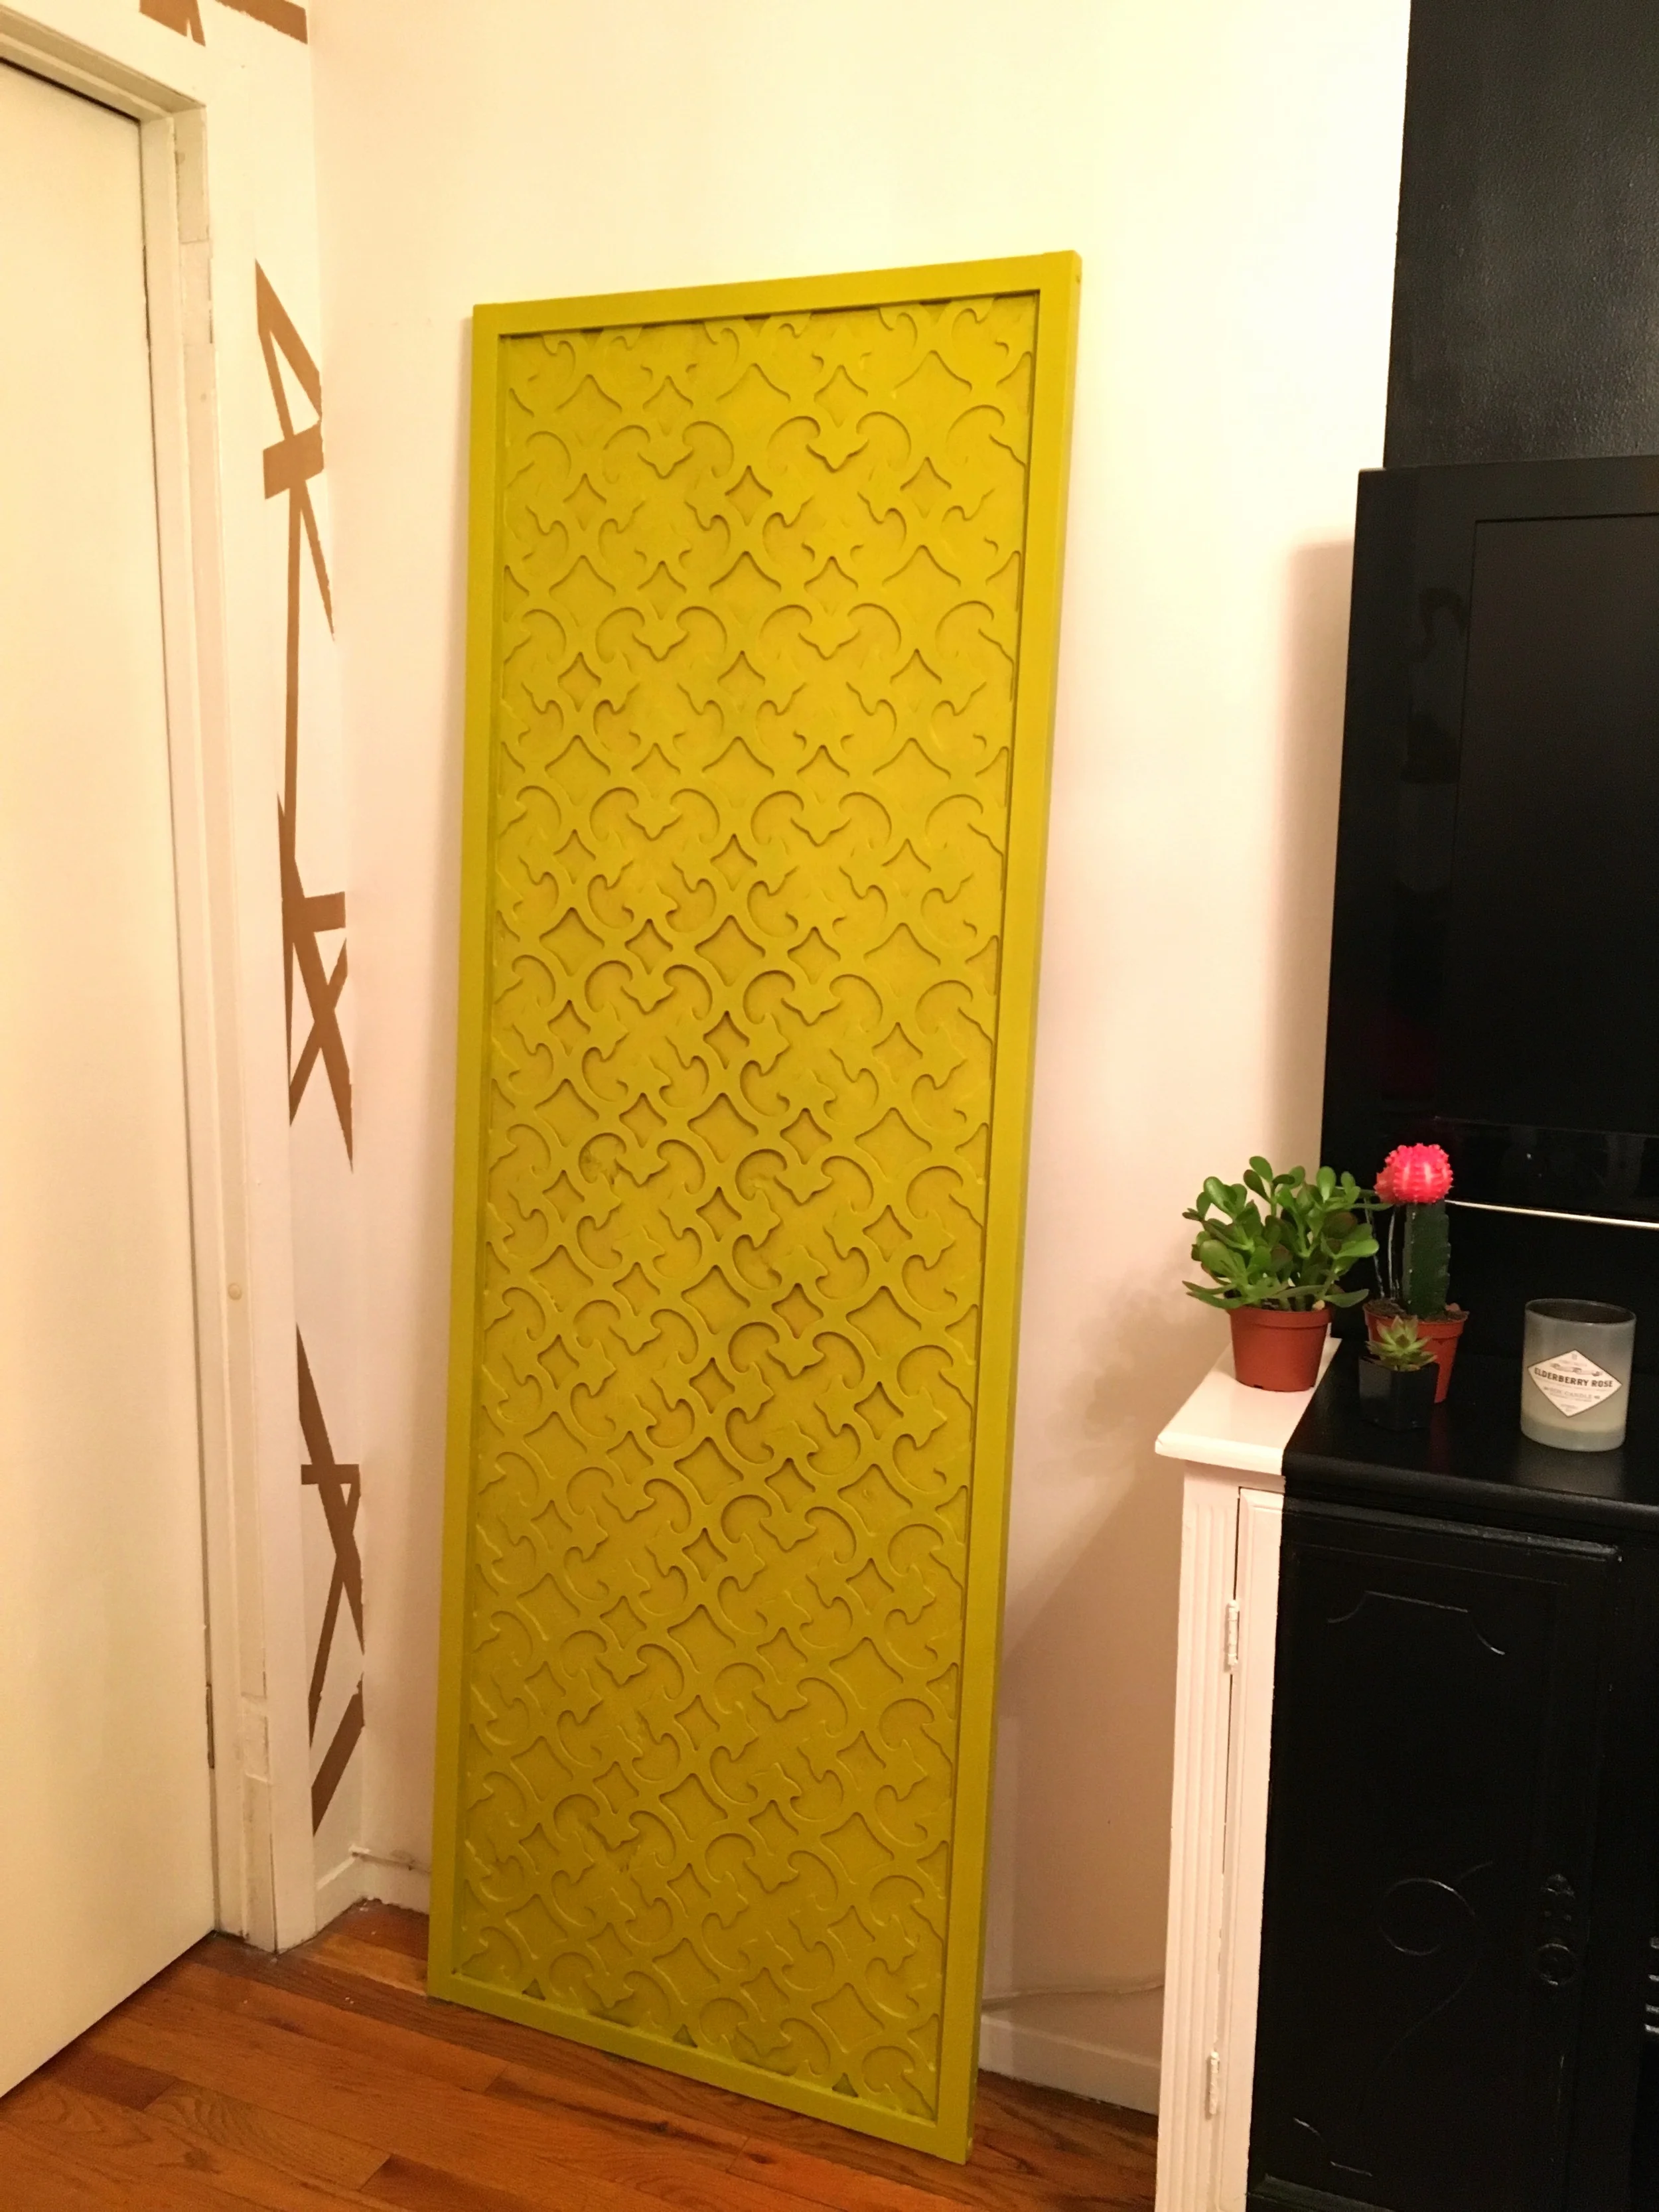
*The cork took about 24 hrs to dry thoroughly. Then the front side of screen got painted. YES y'all-- after much back & forth, we decided to paint the screen b/c that odd fiberglass-like paper material 1. was hideous 2. looked super dated & was in horrid condition (some tears, holes) 3. couldn't be removed separately from the wood fretwork & additionally I couldn't figure out how to easily get new paper behind it/cover it. So we went with this awesome color, pulled right out of the rug:
Oh gurl...give us decorative screen drama:
And then flip over to reveal this bulletin board shiot on the backside:
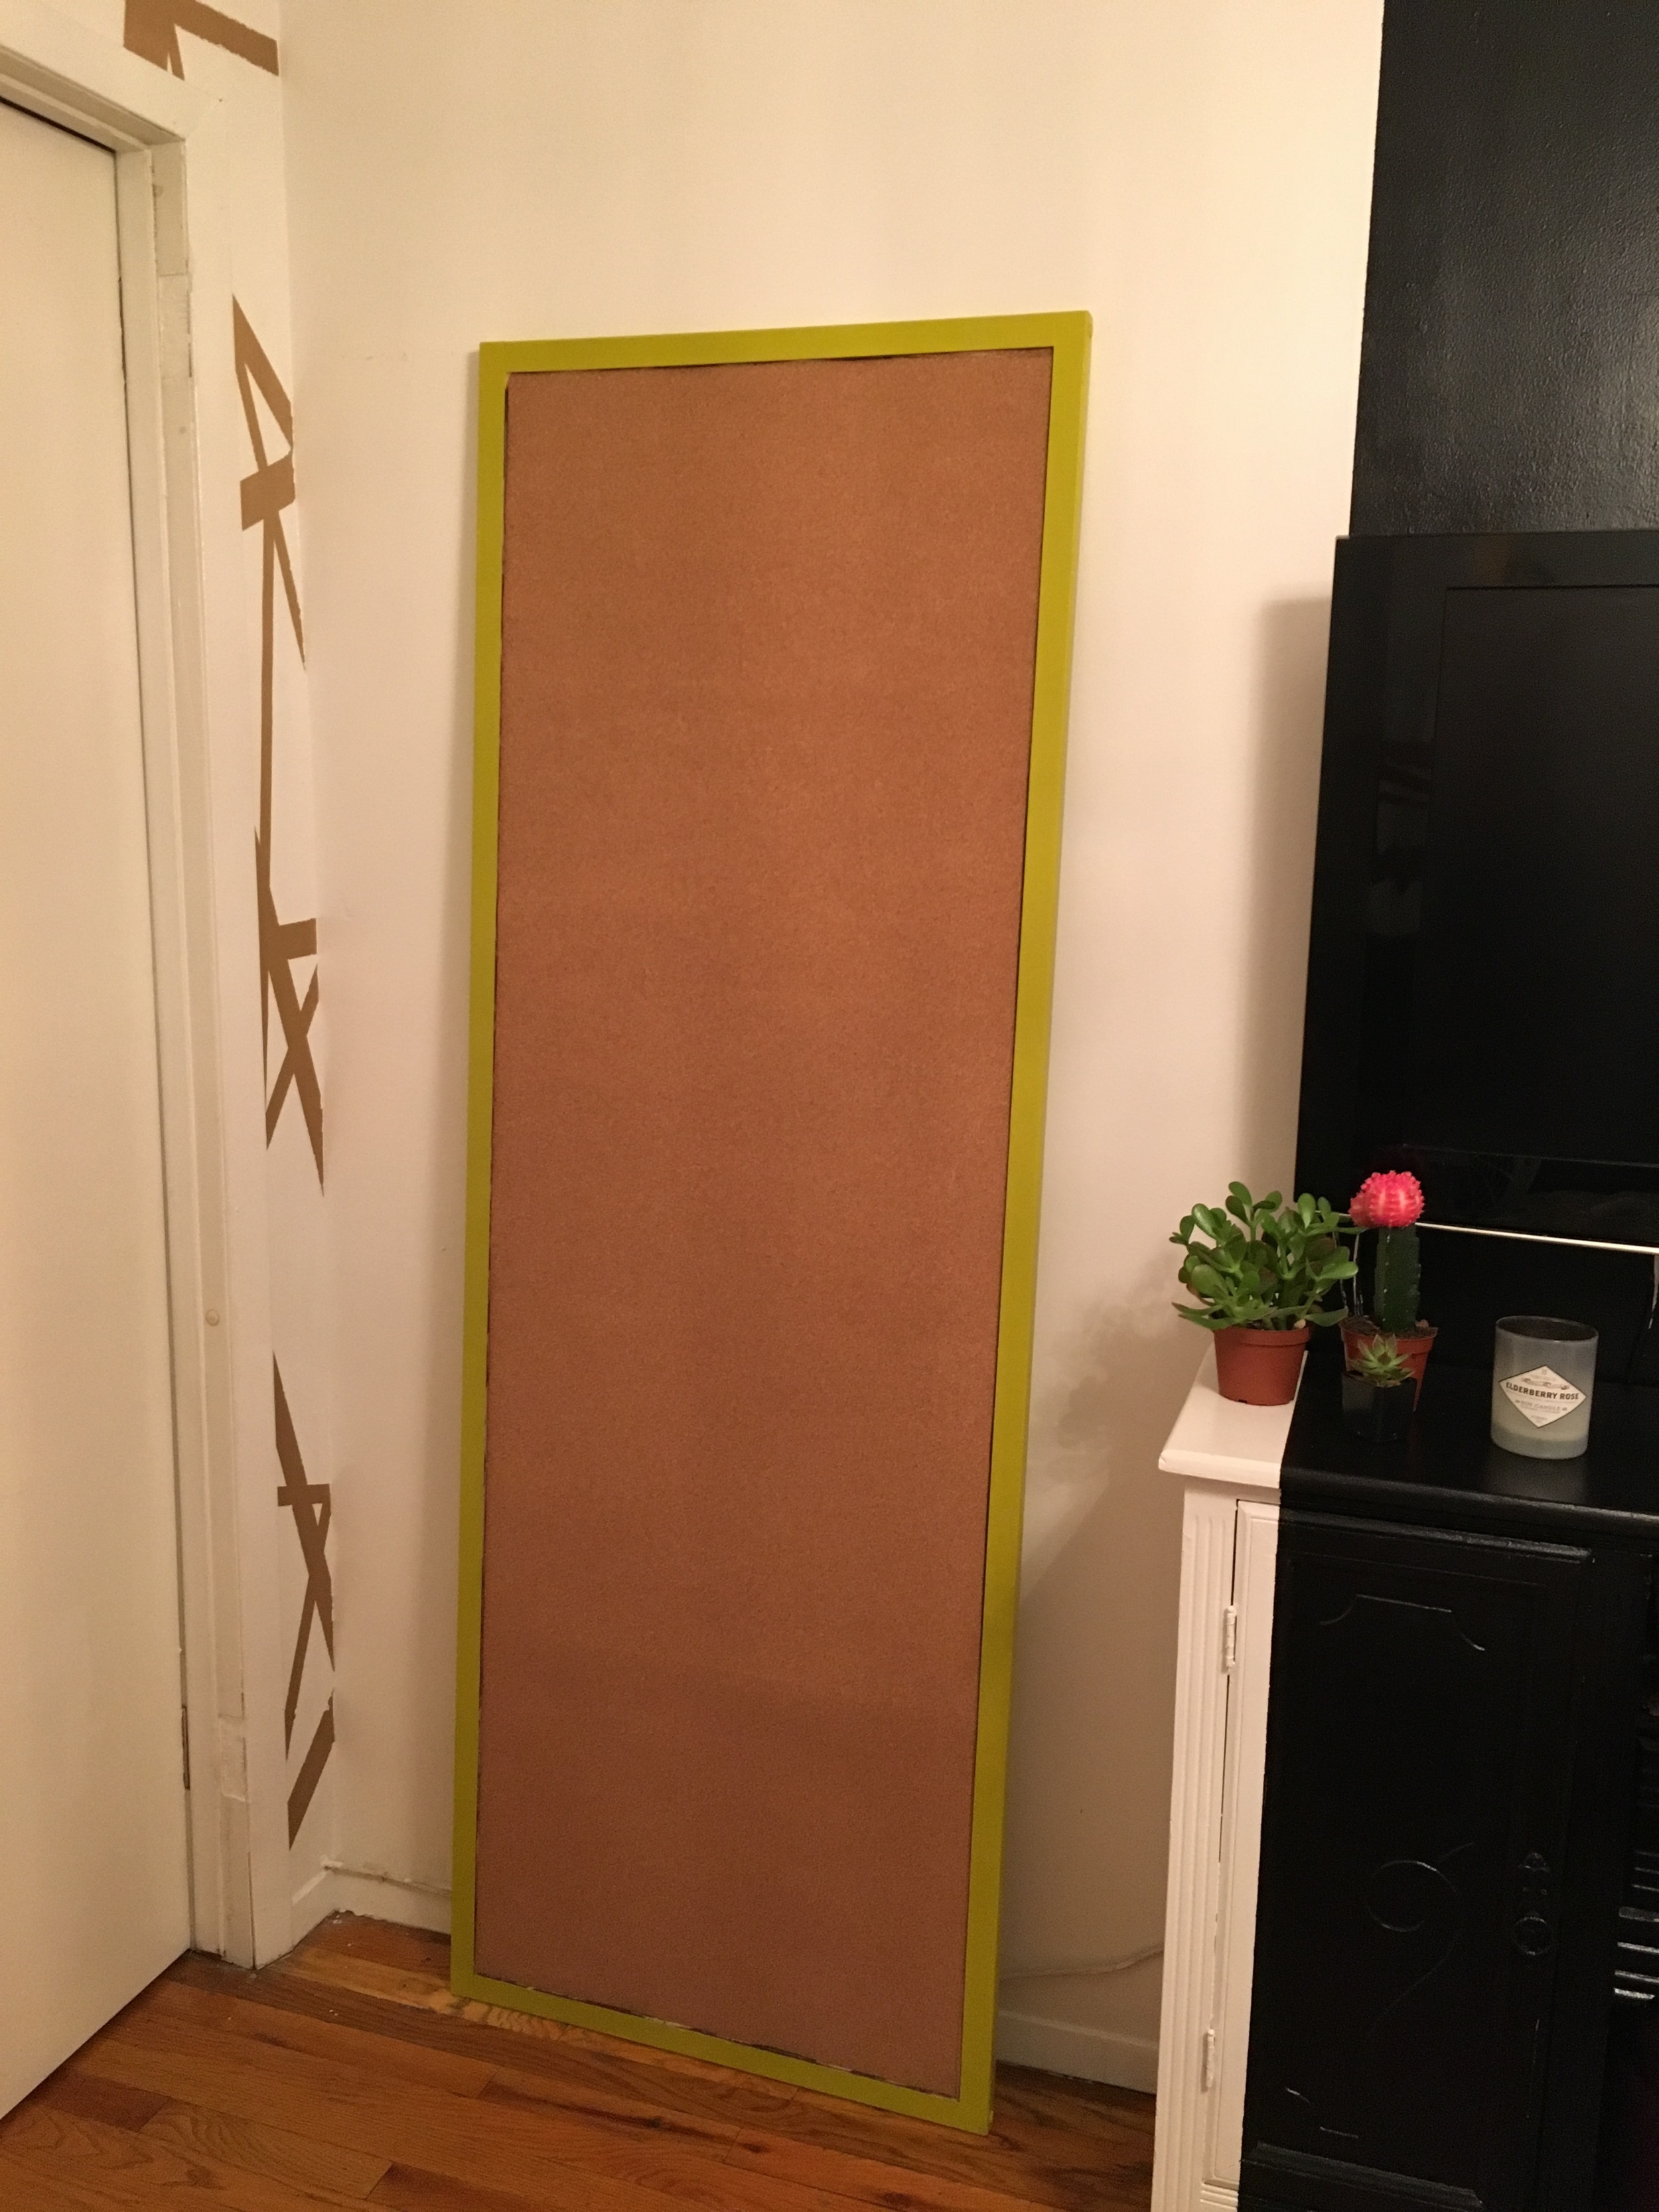
WHAT??? LURV this-- SO thrilled at how this turned out, y'all! I still need to do the other screen with our dry erase board, but it'll pretty much be the same general diy and will get painted the same color, but stay tuned for that...and in the meantime trust that this executrix will be bulletin boarding for her life!!!