One of my fav things is to take an old frame and repurpose it into a bulletin board. When my friend Disa landed a hawt new executrix job with a new office, I wanted to give her something that would not only warm up the place but would hopefully inspire her everyday to becoming America's Next Top Model...or something like it. You know how we do. Here's the frame I found:
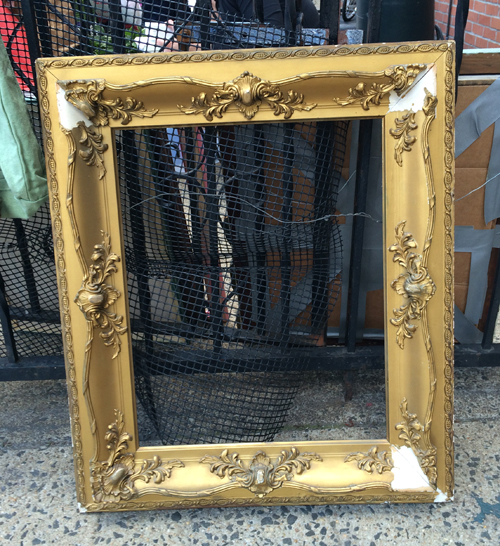
Just gorg...I was debating having all that intricate plasterwork repaired/replaced, but I didn't want to invest a lot of $$$ in this frame, esp. considering I'd be re-purposing it into a bulletin board and that was going to cost money anyway...hmmmmm...the more I stared the more I realized I kinda liked the missing plasterwork b/c it sorta provided a visual break from all that filigree pomp and circumstance happening.

The blank, clean spaces somehow made the frame seem more modern juxtaposed to all that other regalia.

I wasn't lurving the white though. It looked too much like missing/janked plasterwork. But then I thought about a color-- OR, even better here, black?! I got to painting, being careful just to cover the missing plaster areas:

Lurv!

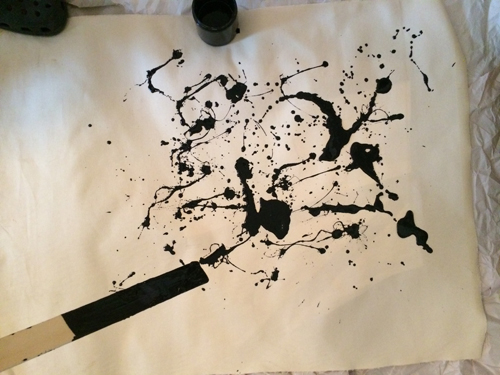
Initially, I was planning on covering the bulletin board with batting and some fabulously printed fabric, but these black painted drippy shaped-looking bits totally inspired me to make my own patterned fabric-- in a drippy/splatter paint! I started with plain canvas, textile medium and regular black house paint. Textile (or fabric) medium, available at most craft/art stores, is amazing and is mixed with regular latex housepaint to make the paint pliable and adhere to fabrics without getting stiff and crunchy. You generally mix 1 part (bottle) textile medium to 2 parts paint.


Once you've made your paint mix, time for some splatterfication...I took a paint stirrer and just went to town. Be careful with this though...paint can and will fly everywhere if you go ALL OUT SLINGING SEVEN WAYS TO SUNDAY. Use some restraint. Also, don't worry about messing up. With splatter painting, you can't mess up. It's supposed to be messy as all hell and random, etc...I did try to make my splatters slightly more blob-like and to make some on the edges of my canvas so that when the canvas is set into the frame, there'd be some connection to the painted framed bits and the canvas-- as if it was more intentional.
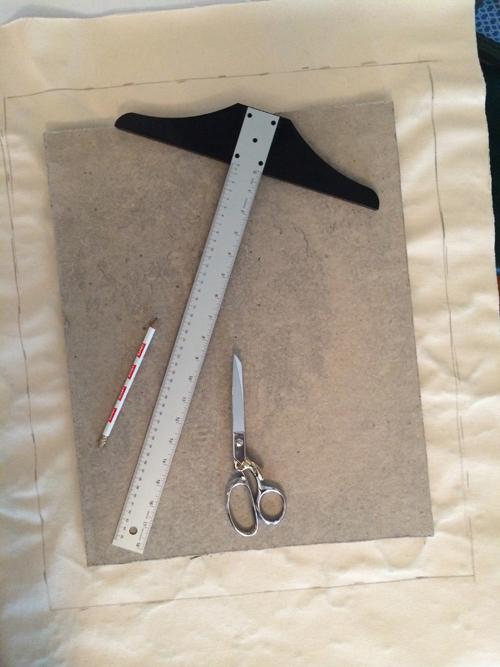
Next you want to measure and cut your homosote. No, that's not some kind of joke-- homosote is a soundproofing material that does wonders as a bulletin board. It can be painted or covered with batting and fabric. It's available at home building centers in large 4' x 8', sheets for about $25-$30. I just so happened to have some left over from a previous project.
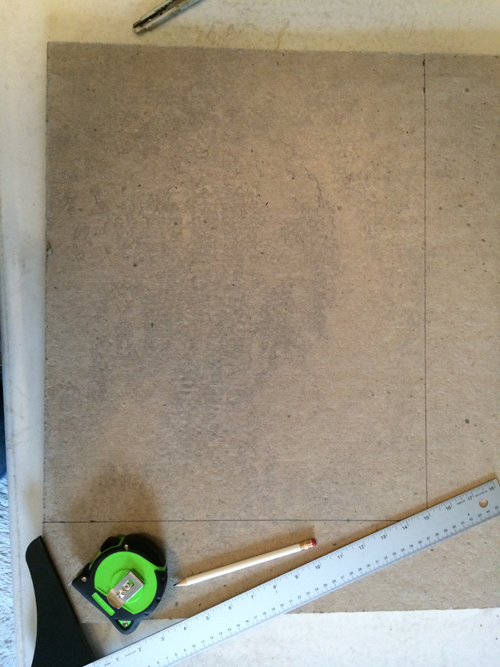
It's super easy to cut too-- I just scored it with a sharp exacto.

Next, lay out your fabric-- the side that you want visible through your frame should be facing down...then, measure and trace a line about 2" out from your homosote. Like this:
And

Carefully cut along your line and remove excess. Now, add a layer of batting. Then, place your piece of homosote back on top of the batting. Now it's time to stretch your fabric and staple to homosote.
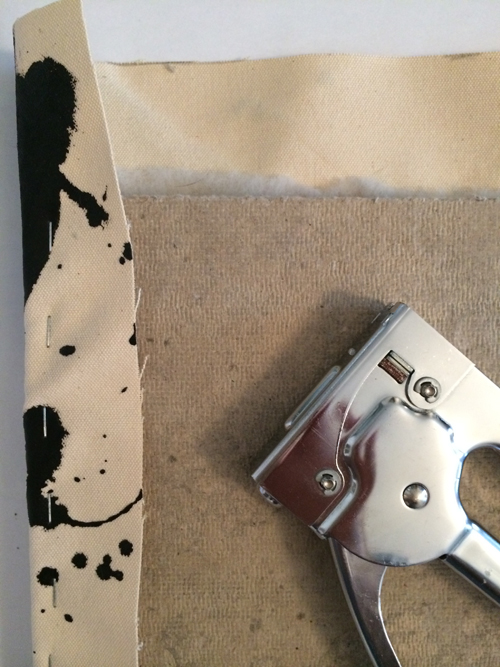
Start with your first staple in the center of one side. Then work out left or right from your center staple.
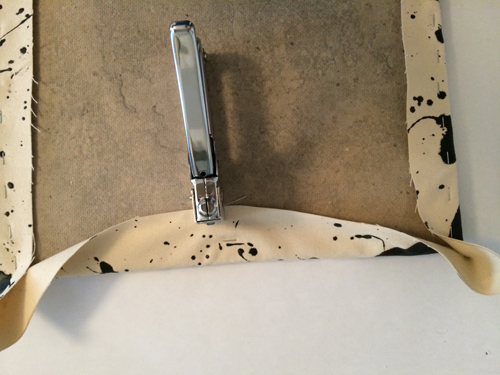
Once that side is completed tackle the opposite side, pulling your fabric taut as you go. For corners, I like to stop my staples on either side of corner with about a 1/2" gap. That usually creates this corner pucker thing, which I have no idea what it's called, but it looks like this:

Then I add a staple on either side of the pucker thing and then I press that out with my fingers and carefully staple down as flat as possible. Y'all know this shiot is HIGHLY TECHNICAL.

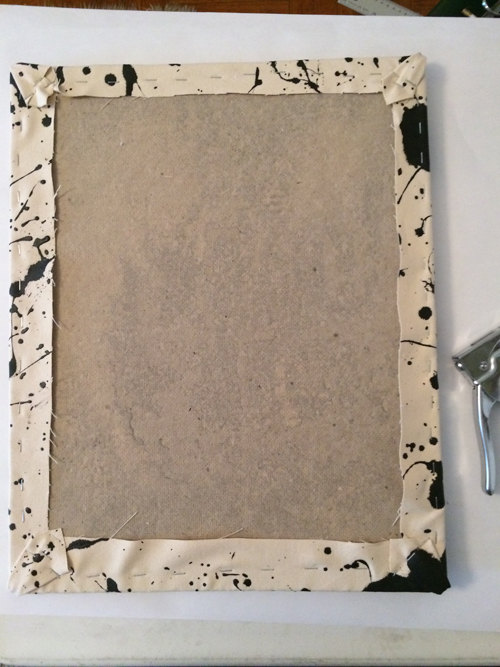
Ohhhh...Ahhhhh...

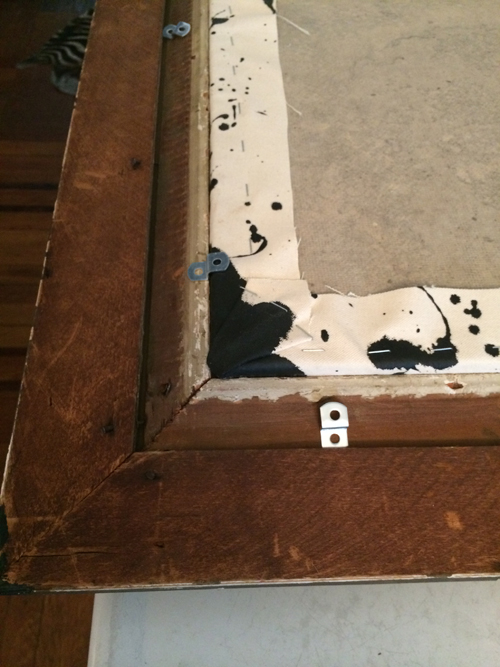
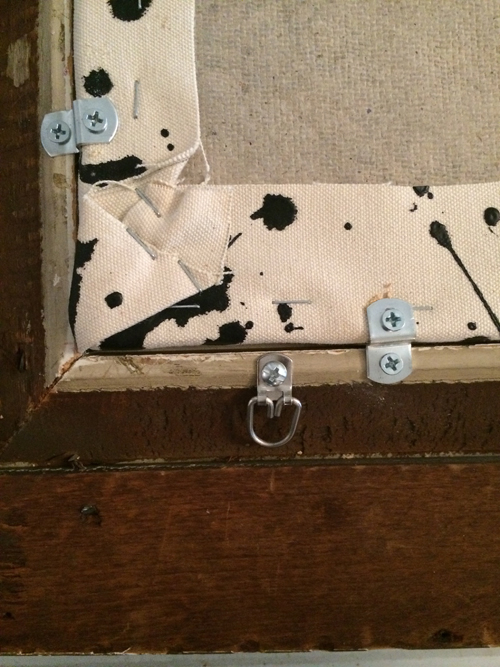
Now, it's time to secure the bulletin board into the frame. I used mirror hanging hardware...looks like a miniature L-bracket...like this:

I spaced these out pretty much equidistantly all along the backside of frame.


Next, I attached hanging hooks. I wanted Disa to have the option of hanging her bulletin board either vertically or horizontally, so I hung 2 sets of hooks in 2 different places on the back of the frame.


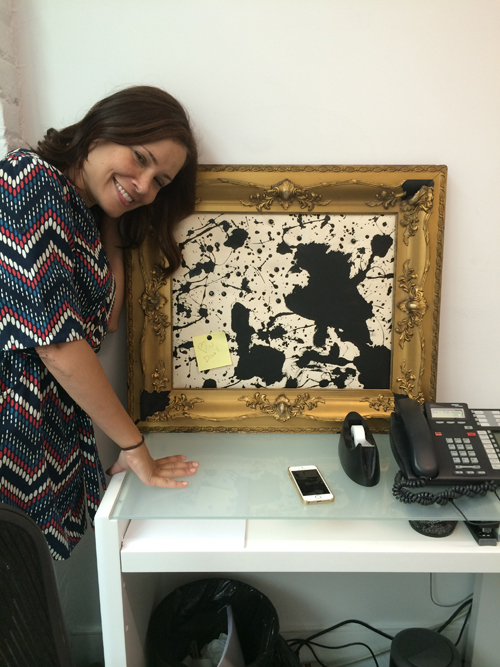
And with that, this bad boy is FINALLY ready! Beyond thrilled at how it turned out:

WHAT?

I threw in some simple black upholstery tacks for use in pinning. You can use regular thumbtacks, but I find that with homosote bulletin boards, esp. ones that are upholstered like this, you'll do better to have tacks that are longer and more substantial for secure pinning. T-pins are also great.

Look at this Executrix-- she's ecstatic! Smeyezing over her new bulletin board!